Tuesday, 9 December 2014

OMG Nail Strips Review

~Items in this post were sent to me for my honest review~
~PIC HEAVY POST~
Hello lovelies,

No Glitter Me Monday nails this week because I was sent some awesome nail wraps from OMGNailStrips to review and finally managed to get them on my nails.

They have loads of different designs (which you can see here) and it took me ages to narrow it down to the two I wanted! I decided to choose something I wouldn't be able to easily recreate on my nails myself and so these were the ones I ended up with:

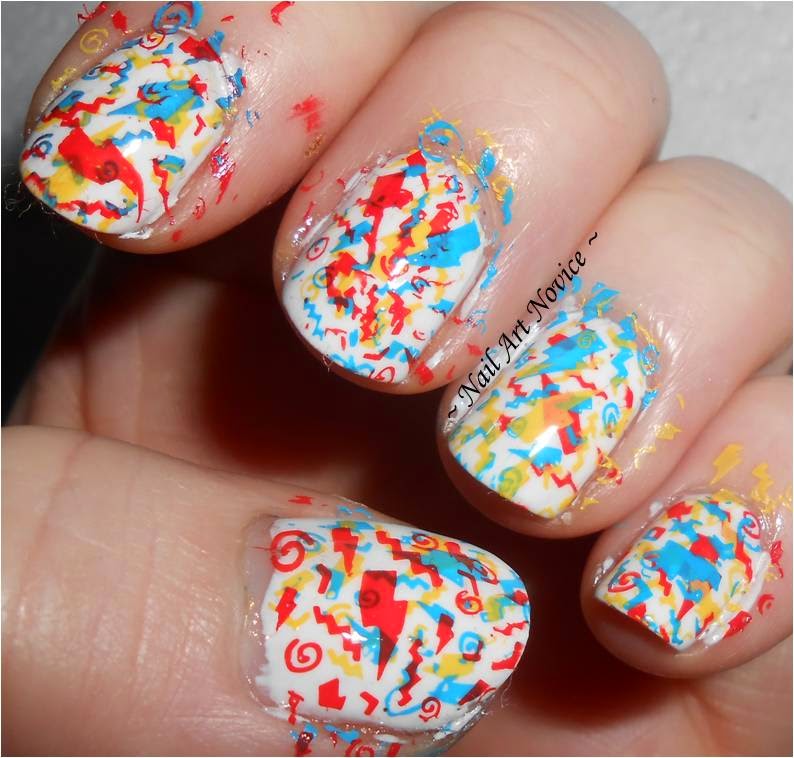
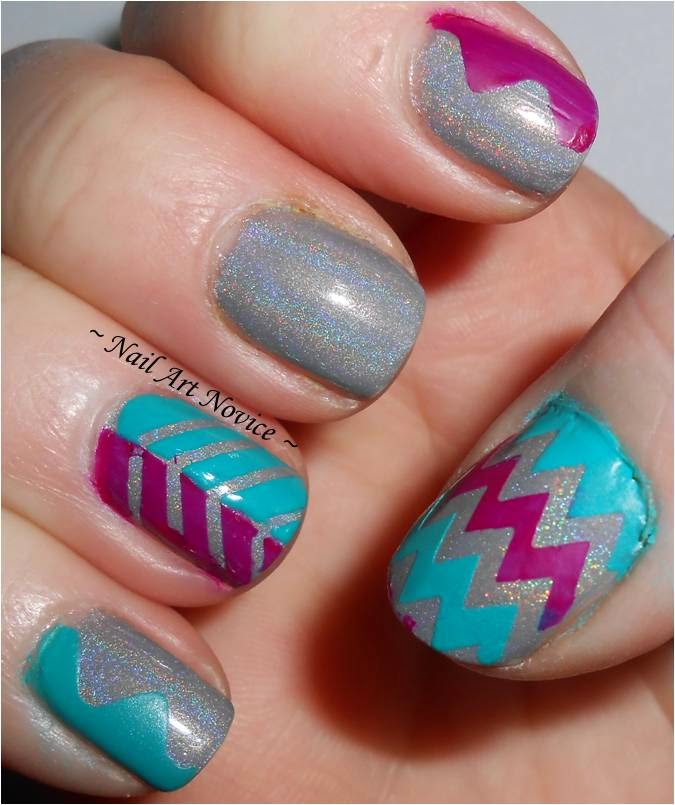
Geometric and Paisley strips
When you open up the package, this is what you get:


That's fourteen different sized nail strips that you should be able to match easily to all of your fingers widths. You can see the width of each strip at the bottom, and they're all about 3cms long-so big enough to cover most nails easily. There is a video on the OMG page that shows you how to apply the strips which I followed almost exactly. The only thing I did differently was that I used each strip for two nails where I could. My nails aren't especially long at the moment and it felt really wasteful to me to have a good 2cm extra on each strip that would just get discarded.
Once I had separated the strips from each other on one set and matched them to my nails, I turned them face down and, using the same size strip from the other set as a guide, drew around the curve on the flat end of the strip to make it double ended (I hope this makes sense, I forgot to get a photo!). Then I removed the plastic top sheet from the strip as normal, but before I removed it from the backing I cut the strip in half, and cut around my guide line so I had a curve to fit into my cuticle on each end of the strip. I applied each half strip to my nails as per the rest of the instructions.
In total I ended up using 6 out of 7 strips from one set for both hands, which means I definitely have enough to do a full mani again if I wanted to! If your nails are longer you can still get a full mani and some accent nails (with careful trimming) or even use them in some funky nail art like Charlie over at Pocket Money Polishes did with her strips.

Here's what I ended up with:


This was straight after I had applied the strips-no topcoat or anything on top. I did find placement a little tricky on my non-dominant hand and had to take off and re-place several strips before I got them perfectly straight. This wasn't a problem though, because although the strips are sticky, they aren't too sticky so until you smooth them onto your nails you can lift them off and move them as needed. I used a rubber cuticle pusher to smooth them down and make sure they were well fitted in my cuticles and side walls and it worked really well.

The next stage of the process was to use a cotton bud dipped in remover (and squeezed dry) to lightly brush over the wraps to help them adhere to your nails better. I tested this with both my normal remover (containing acetone) and acetone free remover and it's definitely something you should only do with acetone free remover as my normal one started to remove some of the design. If you look closely at my ring finger in this picture you can see this at the left hand edge of it slightly.

Please don't judge me for the state of my Seche bottle!

I wasn't keen on the finish of these before I top coated, they felt slightly sticky, but after TC they feel just like normal polish which is good! I was worried that my Seche might shrink them but there seems to have been no issues, thankfully!

I really like these strips. They're definitely not as easy to apply as a plain or glittery mani, but they're really not too faffy-on a par with something like stamping I think. I like the fact you get lots in a pack so you can try them before deciding to do a full mani with them, or use them in different ways. I love the different designs-there's so much choice and there's definitely a lot of options that you couldn't recreate in nail art without taking a lot of time and effort! I'm not sure how long they will wear, I am a little dubious as to their 10 day claims as mine already have some slight tip wear after only a couple-although this could entirely be down to my application and not the strips. I think they're a really simple and fun way to get some funky designs on your nails-plus think how cool this one would look with some Sheer Tints-style colours over the top!

You can get OMG nail strips here and each set costs $7.99 (about £5!) and they ship internationally. I think at the moment you can get 5 sets for $25 (about £16) with the code 5PACK and 10 sets for $45 (about £29) with the code 10PACK at the checkout. You can also find them on Facebook, Twitter and Instagram.

Phew, what a lot of words! I hope you enjoyed my review though.

~Nail Art Novice~

Thursday, 4 December 2014

A-Z Challenge: Fashion

Hello loves!

So I missed last week's A-Z challenge because I just couldn't get what I wanted to actually work and gave up in the end. But I'm joining back in today!
I didn't want to do a mani directly inspired by a dress or pattern because I did that for my Copycat mani, so I did something a little different instead.

The base for these is Freckles Polish-Ben Dover from her new Prank Call collection. It's a really deep shimmery navy which I think is really pretty! I topped it with Let It Glitter!-Golden Star which is another wintery polish that I really like. On my accents I have also got Essence-Sparkling Water Lily which is a really pretty shimmery white. I also used my old faithfuls-my Barry M nail art pens-for the details.


What do you think? Fun, no?

Happy-it's-nearly-Friday!

~Nail Art Novice~

Monday, 1 December 2014

Glitter Me Monday: Let It Glitter!-Candy Cane

Hello lovelies,

Happy 1st December! That means it's officially time for Christmas glitters and I've bought a fair few this year so I thought I'd better crack on using them! This is one coat of Candy Cane over Maybelline-Winner Takes It All. Let It Glitter! is a Dutch indie brand that I've never tried before, but I couldn't resist getting a couple of her Xmas ones this year.

Candy Cane is your typical Christmassy colours-red, green and white micro glitter and it's really pretty! I think it would look nice over a black base as well.


Look at the dinky bottle!
I had planned some nail art with this one but it went out the window so I just glittered them all-yay! I'm finally looking forward to Christmas now I have an income and can actually afford to get stuff for the people I love!
Hope you are too!

~Nail Art Novice~

Monday, 24 November 2014

Glitter Me Monday: Models Own-Valerian

Hello loves!

So I decided to go a little more daring with my nails today and see if anyone at work minds or even notices! This gorgeous polish is from the Models Own Velvet Goth collection, which I have adored from afar since they first came out and I started seeing swatches of them. I'd heard mixed reviews so I'd never managed to justify dropping £20 on the set but luckily as it turned out I didn't have to! I got all of these in a couple of swaps over the last few months-swapping polishes is my new favourite thing...after buying them of course!
The goths are all absolutely stunning matte glittery polishes in different coloured bases-although I personally think they come alive with a lick of topcoat.

I used Valerian and on my accents (we're working up to a whole hand of nail art at work lol) I did a layer of Maybelline-Winner Takes It All and did a fun wavy design using some of my french tip guides from Ebay.

In these photos Valerian looks really sheer but I cannot see this in real life at all-and I've spent a lot of time peering at my nails today to make sure. I guess it's just my camera.


I really like this glitter! It's super pretty and sparkly, and the good news is no-one has noticed at work at all. Baby steps, haha!

Right, I'm off to try and do the bazillion other things I need to do tonight, working full time is HARD WORK.

~Nail Art Novice~

Friday, 21 November 2014

A-Z Challenge: Dark

Hello lovelies!

Only a day late with these! I'm really struggling balancing work with my home life. I'm sure it's something I might get used to in time but for now I am just wiped out when I get in and doing anything is too hard!

For my 'Dark' nails I did a green and black gradient. It was originally going to be purple and black but somehow that idea changed to green and I can't complain too much haha!

Polishes used: Revlon-Black Star, Rimmel-Mermaid Green and Camouflage. All gorgeous shimmery colours!


I really like these, they're my colours! They feel a bit witchy to me.

I'll add all the inlinkz later when I get back from work (still not used to saying that) but I just wanted to get them up for now.

Happy Friday folks!

~Nail Art Novice~

Sunday, 16 November 2014

Sparkly Zig Zags

As I said in my last post, I am starting a new job tomorrow (aah!) and I don't yet know what the rules will be regarding nails so for the first couple of weeks I'm going to go with toned down nails which will be weird! Because of this I decided that I would do one last ridiculously colourful/sparkly mani before I go for something much more work appropriate later this evening.

I started with a base of Dark Metal Lacquer-Flashy Sparklies which is an amazing gold holo glitter polish that just looks fabulous. I used some zigzag vinyls from VyNails and then added bright colours on top using Barry M-Satsuma, Blue Grape, Kiwi, Passionfruit, Key Lime, Sinful Colors-Amethyst, Dream On and Sally Hansen-Brisk Blue, Sonic Bloom, Man-go Team! 


Bright and cheerful! I figured I'm probably not going to be able to wear most of these colours at work so I'd give them a final showing before they go into semi retirement for the time being. Also that base polish is just gorgeous, I love the way that it sparkles!

Wish me luck for tomorrow lovelies!

~Nail Art Novice~

Thursday, 13 November 2014

A-Z Challenge-Copy Cat

Hello lovelies!

I apologise for my absence this past week, life got  a bit hectic and I just didn't find the time to post! I also have big news, but I'll tell you more later on that subject.

This week's A2Z challenge prompt is 'Copy Cat' and I chose to copy the pattern from my graduation dress because it's a bit different and interesting:


I used the blobbicure method, and I have to give some credit to Starfish Nails for reminding me of this techniques existence with her bold mani last week. I started with a base of W7-Black which is currently the consistency of glue and is a pain to work with. I need a new black! Whilst my second coat was still wet, I blobbed on Barry M-Spring Green and Maybelline-Bare It All and then added black dots in the centres of some of the blobs with the W7.


These were really fun to do-watching the polish spread out over the nails was fun. I think I matched my dress pretty well too, which is what I wanted! As ever make sure you check out the hub page/inlinkz for all the other awesome designs.

OK so my big news is that I got my very first full time job, starting on Monday!!! I'm excited and terrified all at once, and I don't quite know what this means for my nails. Hopefully, as I won't be interacting with any customers face to face it won't be too restrictive, but for the next few weeks I might keep it low key just in case. *Sadly puts holo polishes away*. I will certainly try to keep up with the challenge, especially as the next two prompts are easy to make work appropriate, but I shall have to see how it goes. Wish me luck though!

~Nail Art Novice~

Thursday, 6 November 2014

A-Z Challenge-Bold

Hello lovelies!

Back with the A2Z challenge again this week and the prompt is bold. I love how these non-specific prompts are really open to interpretation so that everyone comes up with something different. Two things sprang to my mind for the word 'Bold'-black and white manis and really bright colours. As I did some pretty bright colours for last week's prompt I decided to go down the black and white route, but add a hint of bright colour to make it fun.

I started with a base of Barry M-Matt White and then triple-stamped on top of it using MoYou London-Back to the 80s 03 changing up the angle that I put the stamp on and generally playing around with them. For my stamping colours I used Sally Hansen-Brisk Blue and Lightening and Barry M-Satsuma.
This is how they looked at this stage (pre clean up) and I think it's a kinda cool effect!


I'm definitely going to have to do this again someday cos I like how it looks a bit mad and random.
Over the top of that I did some vertical stripes with striping tape and W7-Black.


What do you reckon? I think they're pretty bold and I love the flashes of colour underneath the stripes, plus they were really fun to do-not having to think about where you're placing your stamps is liberating!

That's all from me as I have to head out five minutes ago, but make sure you check out all the other Bold manis in the inlinkz and on the A2Z hubpage here.

~Nail Art Novice~

Monday, 3 November 2014

Glitter Me Monday-Firey Chevrons

Hello loves, happy Monday!

It's nearly bonfire night in the UK (one of my favourite nights of the year!) and I decided it was the perfect time for me to use these polishes together-the names and colours are really appropriate!


On the left is Tara's Talons-Bonfire and on the right is Dollish Polish-I Volunteer As Tribute (although personally I think this one should be called Girl On Fire, because it's just exactly how I imagine Katniss' dress in the second book. I realise if you've never read The Hunger Games that will mean nothing to you...). Both of these are full of firey glitters and I thought they really needed to be paired up.

I've done a chevron mani over a base of Barry M-Coconut (I really need to get a back up bottle of that bad boy!) using some guides I got from ebay ages ago.


What do you think? I think they're perfect for bonfire night and I'm looking forward to seeing all the fireworks on Wednesday!

~Nail Art Novice~

You can get Dollish Pollish here and Tara's Talons polishes here and you can currently get 30% off Tara's with the code 'Halloween' at the checkout!

Friday, 31 October 2014

Happy Halloweeeeeen!

Hello lovelies and a Happy Halloween to you all!

This is my Polish Party mani for this month because the theme couldn't be anything other than Halloween, could it! I couldn't pick a single theme for this one so just did a skittle-it was lots of fun.

Base colours: W7-Black, Moyra-#63, China Glaze-But Of Corpse and Stop That Train! (both from my Coloristiq box) and Barry M-Matt White.
Glow In The Dark toppers/colours: Violet Rose Polishes-Es Paradis and Amnesia, Dark Metal Lacquer-Beings Of Light and BK Polishes-#5, #6 and #10.

I used vinyls from She Sells Seashells for the pumpkins/bats and freehanded the rest!


I kinda love my little ghostie's reflection ^_^
So there we go! Hope you all had a good Halloween and didn't get too many tricks ;)

Check out the other spooky manis in the Inlinkz!

~Nail Art Novice~


Thursday, 30 October 2014

A-Z Challenge-Angles

Hello lovelies!

I've started a new challenge this week-joining lots of other awesome bloggers and instagrammers in an A-Z challenge with a difference. Unlike the one I did before (so long ago now!) this one has prompts for each letter instead of just being any nail art beginning with it. This weeks is Angles and I have done a look inspired by this tutorial on the Nailside blog.

I used Sally Hansen-Lightening (I hope they mean making lighter in colour and not the stuff that comes with thunder) which I picked up in the pound shop the other day because I can't resist a yellow cream. I made my squares with striping tape and Barry M-Damson and Kiwi. Finally I added sheer pinky purple triangles with BK-#10 which is a jelly GITD polish.


I love how bright these are! They're not exactly subtle but quite fun I think.

Make sure you check out the inlinkz for all the other 'Angles' manis or vist the challenge's hub page for all of them across all of the weeks. I'm really looking forward to seeing what everyone comes up with for the prompts, and I like the social aspect of doing a challenge with other people again-it keeps me on track much better!

~Nail Art Novice~

Monday, 27 October 2014

Glitter Me Monday: China Glaze-But Of Corpse

Hello lovelies!

I got this lovely polish through Coloristiq and when I added it to my wish list I had this exact mani in mind. All in all it was quite quick and simple to do-two coats of But Of Corpse and then the rest I did with my Barry M nail art pen (and a couple of dots of Coconut for the eyes). BoC has a fairly matte finish so I added a matte topcoat to finish everything off and Voila! Adorable Frankenstein's monsters! I thought they were quite fitting given the name =p


I don't think the real Frankenstein's monster would be quite as chipper as these ones are (he was a bit angsty in the book) but I think they're cute! And I really like that green (of course I do, haha!)-I'm sad I have to give it back in a couple of weeks.

Happy Monday!

~Nail Art Novice~

Wednesday, 22 October 2014

Coloristiq Polish Rental Service

~PIC HEAVY POST~

Hello loves! Something slightly different today.

I recently heard about a new service called Coloristiq which is a polish rental system based in the UK-they've just started up. They had a promotion where the first 5 people to sign up to their website would get their first three months free and I was lucky enough to be one of them, which has allowed me to try it out!

Basically, this is how it all works:

So that's what I did! The service costs £14.49 which includes postage to you as well as return postage, and "renting" three bottles for 30 days. You can use each bottle up to three times as a full mani (two coats on each finger) so in the 30 days you can do up to nine manis with the polishes in your box. 

This is how mine came:


There's also a return postage label at the bottom of the box too. The box is a nice size-it fitted through my (tiny) letter box just fine so you shouldn't have to do any waiting around for the postman to bring your goodies.

They have loads of high end polishes to choose from-Essies, OPIs, China Glazes and Morgan Taylors (which is a brand I haven't heard of but I'm looking forward to trying!). I spent a good while googling swatches to make my wish list (as the site only has bottle shots, which aren't always the most helpful!). 

So let's see what I got this time around:

Side note-I LOVE that holo rainbow =D
When you make your wish list you can make some of the polishes 'priorities'-i.e ones you really want to get in your next box, and you can have up to three of these. I only added one (But Of Corpse) because I enjoy the surprise of not knowing what I'll be getting. Coloristiq say they will always try to get you the polishes on your priority list as long as they're available, and otherwise the polishes you get will come from your wish list. I haven't had chance to use any of these polishes yet, but keep an eye out for them!

One thing I do like about this service is that they won't take the payment for the next box until you have returned the first one, which means you won't have any direct debits coming out without you knowing about it in advance, and there's no extra costs to pay if you keep them longer than the 30 day period (providing you don't use them more than the Fair Usage amount!). Also because the return postage is paid you don't need to find time to go to a post office-you can just post the box in a normal postbox.

If you have any questions about Coloristiq then their FAQ page is quite comprehensive, or you can just email them-I've found they're quite friendly and happy to answer questions about the service! I think this is a really good idea for newbie collectors who might be unsure about buying expensive polishes without trying them or for people who just don't have the room to have an enormous collection of all the polishes they want. I'm really looking forward to trying the ones I got this month and seeing what I get in the next!

What about you, will you be trying it out?

~Nail Art Novice~

Coloristiq Links:

Monday, 20 October 2014

Glitter Me Monday: Chubby Owl Polishes-Blitzed Unicorn II

Hello lovelies!

It's been a couple of weeks since I've done a Glitter Me Monday post but I'm bringing them back today. This mani is not really my normal thing but I am surprised by how much I like it.

Blitzed Unicorn II is a polish I picked up in Chubby Owl's closing down sale (booo!) and it's lovely! It's a white crelly with lots of pastel coloured hex glitters and some gold holographic micro glitters in there too:

Three (I think) coats over Barry M-Coconut
The base is very sheer which means you can see all the glitters in all the layers, which I like, but it does mean it needs undies. It's so girly and pretty!

As extras I used my explosions nail vinyls from Nail Stickrs and used Sally Hansen-Sonic Bloom which is a super bright pink I picked up from poundland the other day (possibly the first ever pink I've actually chosen to get!!!). I'd originally planned to do something else over the top but that wasn't working out for me so I left them in all their pink glory!


As I said these really aren't very me but I do kinda like them! I think the glitter is really pretty and that pink is so POW in your face that even me (the least pink person in the world) can't fail to be charmed by it!

Hope your Mondays were good, and if not just keep telling yourself you're one day closer to the weekend ;)

~Nail Art Novice~

Saturday, 18 October 2014

Brighten Up A Lonely Day

Hello lovelies!

Today's mani was born out of me just pulling out random colours from my untried pile that I thought looked quite good together. I started with a base of the very gorgeous Dark Metal Lacquer-Lonely Day which is a grey polish with a subtle linear holo running through it that I think looks really pretty. To add a little colour I pulled out two bright matte polishes-Barry M-Cancun and Sinful Colors-Dream On. I did a skittle mani with various different vinyls and tapes to make different shapes on the nail.


I actually really like the contrast between the matte and the holo and I think the colours are fab too! HOw about you?

Happy weekend!

~Nail Art Novice ~

Tuesday, 14 October 2014

Mani Swap With The Imperfect 10

Hello loves! A couple of weeks ago Rachel from The Imperfect 10 blog tweeted me to ask if I wanted to a mani swap and of course I said yes! I really like doing things like this, it's always really interesting to see how people recreate something of yours and it's fun to do yourself as well.

After looking through her blog, I finally (after a lot of deliberation) chose this Black Magic mani from last year to be the one I would recreate:


I thought it looked really glamorous and smart and really liked the look of it. In my recreation I used gold instead of silver which still looks fab against the black. I used Maybelline-Winner Takes It All and Barry M-Black Multiglitter for some sparkle.


I also just noticed that I swapped the accent colours over, I hadn't realised I'd done that until now, haha! Still, I think it looks cool. Black and gold is a classic combo and I really like the line/dot combo-I hadn't thought to combine them before but it looks good I think.

Here they are side by side


and here's all four manis together!


Make sure you go and check out her post here and leave Rachel some love too-her blog is fab!

This was fun! I'd love to do more of these so if you're interested in doing a mani swap then send me a message or a tweet, or leave me a comment and I'll get back to you =)

~Nail Art Novice~


Sunday, 12 October 2014

31ish Week Nail Art Challenge 18-Half Moons

Hello lovelies!
Being a bad blogger again recently and also had interference from work shifts so haven't got anything on my blog for a while even though I've had these done since Friday...forgive me?!

These aren't your typical half moons but there are half moons on my thumbs so they totally count, right? I've wanted to redo my owl nails for a while just because they're cute and this was the perfect opportunity!

I used lots of polishes for this one! I started with a couple of coats of Sinful Colors-Social Ladder to give my natural nails a bit of a shimmer. I used Smitten Polishes-Bifrost on my thumb and did the moon in Dark Metal Lacquer-Lonely Day which is a grey holo which I really need to use on its own because it's really pretty! For my owls I used Barry M-Chilli and Damson, Sinful Colors-Exotic Green and Collection-Twilight. I did the eyes with Collection-Look At Me!, the beaks with Barry M-Mango, and the tummy patches with Barry M-Lychee.


They didn't end up being the neatest things ever but I like em-they're fun and bright!

I don't really have much else to say for once!
Hope you all had a good weekend =)

~Nail Art Novice~
Related Posts Plugin for WordPress, Blogger...