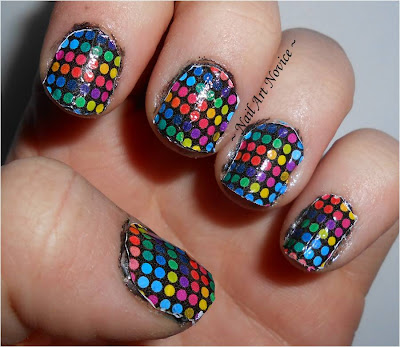
Showing posts with label YRNails. Show all posts

Wednesday, 18 June 2014

Straya Baby!

So this is it! This is my last 24 hours in this country until the end of July which is both exceedingly exciting and also nerve racking!  One of the reasons I'm going to Australia is to meet my boyfriend's parents so I reckon I'm allowed a jitter or two! I know it's going to be a truly amazing trip but I will miss home a lot, I love Britain!

In honour of the occasion I have done Australian themed nails using Aussie flags, their national colours and a couple of adorable marsupials! Polishes used were: Barry M-Navy, Spring Green,  Rimmel-Red Obsession and Revlon-Electric, plus my Barry M white nail art pen. The decals were from YRNails.


I know the Union Jacks aren't quite right but since I only have dotting tools to work with I thought it'd be too fiddly to fill the blue in again, and I still really like em! I'm hoping they last a good few days as I have no idea when I'll next get to do my nails (which feels really weird!). I honestly don't know how much time I will have to post any manis I do do, but never fear, I have lots of guest posts from lots of fabulous nail artists to keep you interested! Also I am going to try and update my manis to instagram even if I cannot blog them, so if you want to keep in touch with me on my travels make sure you follow me over there. Also also, make sure you stick around for when I'm back cos I have a giveaway or two planned, so you don't want to miss that!

Right, that's me for now! I will leave you in the very capable hands of all my guest posters and I will see you soon! Have a good summer my lovelies!

~Nail Art Novice~

Thursday, 19 September 2013

Mish Mash Challenge Week 8-Cold

Sooooo...I missed a week of the Mish Mash challenge and feel really bad about it. I keep going up to visit my boyface in Sheffield and then ending up staying longer than I anticipated and missing lots of posts-oops! So today's mani is the new Mish Mash challenge prompt which is cold (co-incidentally ended up very close to 'Hot' in the list!). I wanted something relatively simple so I picked out some 'cold' colours (Pale blue, white and silver) and went at it.
Polishes used: Revlon-Blue Lagoon, Rimmel-Serene and H&M-Silver Frost. I added some wintery tree decals from YRNails to contribute to the effect too.


I actually really like this, it's definitely 'cold' in colour but it's pretty and delicate too. Now I've got the hang of them I really like using these decals, they're such a simple way of sprucing up an other wise boring mani, I think.

I'm off camping this weekend with my fella (Lovely weather for it, ey!) so I might be a bit absent again, but will try and get some appropriately themed nails done before we leave!

See you soon, have a good weekend all!
~Nail Art Novice~

Don't forget to check out the other ladies fab efforts this week:


Wednesday, 10 July 2013

B-B-B-B-Birthday Nails!

~Pic Heavy Post~

Hello lovelies, I'm back to blogging again now after an awesome week of fun things! I apologise if I haven't replied to your comments from the past week or so, but I'm getting there eventually-thank you for them all!

As I mentioned it was my BIRTHDAY week last week and so I did some appropriate nail art. For my party evening I wanted to keep it relatively simple so I pulled out my new Dandy Nails-Bory Alice which I bought with a voucher I won in a giveaway. It's a super super pretty duochrome shimmer which changes from blue to purple with a hint of gold in there too. Of course it's nearly impossible to capture properly, but I tried! I also added a couple of birthday-themed accents with Barry M-Gold Foil and Revlon-Silver Screen.


You can kinda see how pretty it is, right? It looked really awesome when it caught the light but I couldn't really get it across well. 

Anyhow. For my actual birthday I went to see Hairspray the musical at my local theatre (Hurrah!) and wanted themed nails (of course!). I broke out some of my new YRNails decals on top of some Barry M-Mango and Matt White and Sally Hansen-Brisk Blue. My thumb nails I adorned with some theatre mask comedy/tragedy faces, done with Barry M nail pens over Rimmel-Red Carpet. 
These aren't the best as I did them in a bit of a rush so don't judge my sloppy techniques! I did chequerboards using my Barry M nail art pen to represent the shoes Tracy (the lead character wears) throughout the show. The bow is to represent the show's logo and the pointy glasses are worn by one of the characters and are very 60s so I thought they would be fitting.


I didn't get a picture of my 'tragedy' mask on my other thumb because it looked a little special, but I promise it was there! The show was really awesome and I had an amazing birthday!

Anyway, this post has gotten longer than I expected so I'll leave it there, but I'll be back to normal blogging soon!

Thanks for stopping by,

~Another-Year-Older Nail Art Novice~

Saturday, 29 June 2013

ABC Challenge: Y is for Yellows and YRNails

I can't quite believe that it's nearly the end of the ABC Challenge already! I know I joined at the half way mark but it still seems to have flown by so quickly! Luckily we're already planning our next challenge as a group, woohoo!

So this week is Y and like a lot of people I reached for the yellows-although I don't actually have any polishes that start with 'Y' to use! This is a couple of lovely Revlons-Electric (the darker-3 coats on its own) and Sunshine Sparkle (the paler-2 coats over a coat of Barry M-Matt White). I also added in a lovely water decal by YRNails to get another Y in there, and because it's been a while since I used them. I've only done so twice before-once fairly successfully and once disastrously! I was hoping that this time it would go well, and thankfully it did!


I chose these delicate little bird cage decals to go with my lovely shimmery yellow and I really love them! I also added some La Femme Beauty glitter to my other nails-sadly it doesn't have a name or even a number but it's a mix of small purple and even smaller black glitters with gold and turquoise hexes and it's really pretty-I think it looks fab over Electric (my new favourite yellow polish-it's so bright and has a touch of shimmer to it too!)
For such a relatively simple mani, I'm really enjoying this look. I also really can't believe we've only got one week left in this challenge-boo! If you want to join in our next one then I will let you know the nitty gritty next week in my Z post. The ladies involved are all really wonderful and I'm so looking forward to taking on another challenge with them all. As ever, don't forget to check out all their fabulous 'Y' manis in the Inlinkz below.

~Nail Art Novice~


Tuesday, 16 April 2013

Try Something Tuesday-Full Nail Water Decals: A Disasticure

~Before I begin I just want to wish Rara a very Happy Birthday, coz it's TODAY, Yay!~

PIC HEAVY POST

So the other night I went out to a comedy gig for Rara's birthday, and I wanted to co-ordinate my nails with what I was wearing-my beautiful black and white polkadot rockabilly style dress. I've done plain black and white spotted nails before and wanted something different so I chose some fun spotted full nail decals from YRNails which I thought would look pretty good. I watched their 'How To' video along with Lisa from Geordie Nails' tutorial video (which is really helpful if you've never applied full water decals before!) and got all my equipment ready to go. 

I started by painting my nails (badly) with two coats of Revlon-Black Star which is a lovely black with a silvery shimmer running through it to give a base colour if I needed one.


Then I set about applying my water decals and...here's where it all went wrong. Now I'm definitely not blaming the decals for this, I've seen lots of people use them well and get great results, I think it was my atrocious technique that was to blame for the mess they ended up in. 
Firstly, let me show you how they were supposed to look, with a little help from the lovely Wendy from Wendy's Delights:

Find her superior review of these decals here

I'm a bit ashamed of how badly mine do not look like the ones above really. Any how, here goes:

They don't look so bad from a distance do they?

Up close though you can see that I really did a terrible job!

And don't even get me started on my right hand!

I experienced SO many problems with these that I don't really know where to begin. I think my nails on my right hand were a little short (thanks to my Sheffield trip) because I struggled to get rid of the excess decal on my index and middle fingers simply due to how close to the ends of my fingers the nails are. Obviously I didn't cut them down as well as I could either, I didn't want to take too much of the widths so that I wouldn't end up with bald patches, but I should have been less cautious and they would have fitted my nails much better.

However even with the sizing difficulties I didn't manage to get these to stick to my nails at all. I followed all the directions to the letter, but they just sat on top of my nails and slid about no matter much I tried to get them to stay put by smoothing them into the corners. Even my right hand ring finger (which is probably the only one I cut to the correct size!) didn't stick down on its own, I ended up putting a layer of top coat underneath them all to hold them into place! I don't know what I was doing wrong. I also covered them in layers of topcoat, and they still lifted away from my nails.

As you can see only two of these are completely flush with
my nail! 

I ended up with lots of rough edges, lifting sections and creases and they just didn't look very nice. I went for a shower about an hour after putting these on and they all just lifted off so much that I just peeled them off in the end.

This happened just from picking up my towel! They all ended up
like this though =( =(

I'm really sad I wasn't able to make these work for me! I think they have the potential to look so amazing, and all the other blogs I've seen with people wearing them have been beautiful, I've never seen anyone else have this amount of problems. I am determined to try these again and get them to work, but maybe not for a while because I'm so disheartened by this first attempt =( I think next time I'll try them over naked nails to see if that helps, and obviously cut them down better.

In the end, because I was running out of time to get ready for the evening I ended up wearing something very simple (but lovely) over my Revlon base-two coats of Absolut Lacquer-Mrs Claus' Night Out. Although this is technically a Christmas polish, one of the reasons I bought it was because it had the potential to be used all year round, and I was right! These pictures were taken the day after so there's a bit of tip-wear but they're still in better condition than my decals were! I really like this combo =)


So there ends the sorry tale of my first attempt at full nail water decals. I hope you've at least enjoyed looking at my total failure, and if you have any hints or tips as to how I can make them work for me, please let me know in the comments!!

~Nail Art Novice~

Tuesday, 12 March 2013

Try Something Tuesdays-Water Decals

I recently discovered YRNails water decals on Geordie Nails' blog and decided to treat myself and Rara to some (although Rara has only just discovered this and doesn't know which ones I've got her yet =p) because they have some really awesome designs but at prices which won't break the bank.
I got both the transparent designs and some full decals but this mani uses the partial ones, and I'm leaving the full ones for a braver day!
I had a couple of practises and they're fiddly little things so not great for someone like me who's clumsy and uncoordinated but I managed. They're not perfect but they still look really cool.

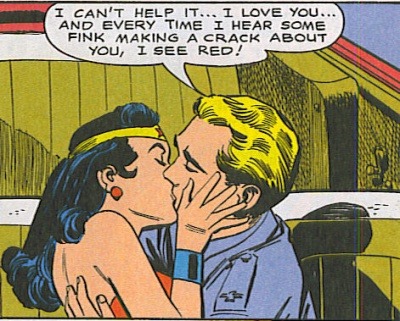
I chose these comic book style 'Pow' ones for my first time using them, and put them over what I consider to be "classic" comic colours-black, white, red, yellow and blue

Like this...can't understand how he's talking AND
kissing her at the same time though...
(Via)
Polishes used were the usual suspects: L.A Colors Art Deco-Black, Colour Me-Colour Me White, No 7-Siren, London Girl-Shade 148 and Barry M-Cobalt Blue.
I didn't want to waste a decal on a black polish so I did something a little different on my accent nails.


I was going to write 'POW' in my bubble but my nails are just too
teeny & I'm not that skilled! I like the exclamation mark too though.


I think these decals look really cool and I'm loving the retro feel to this mani. I was expecting them to be sticky once you removed the backing paper from them, but they aren't which means you can move them around until you are happy with their placing and then top coat the hell out of them to get them to stay there. They're not perfectly flat on my nails but I think that's more because I didn't cut them out perfectly so the edges have lifted slightly/because I didn't dry them all very well. You get 18 designs per pack, so I still have enough left to do a full mani if I wanted to-very good value for money at a pound a pack!
I think they're brill and will definitely be buying from them again in the future, as well as trying out my full patterned decals at some point too.

~Nail Art Novice~


Ooh and as a bonus here's a picture of one of my practice attempts over my mint nails:

I thought he was too cute not to share really.
Related Posts Plugin for WordPress, Blogger...