Thursday 28 February 2013

Star Spangled

I think I'm in love again, this mani is really really awesome. I knew as soon as I saw this post from The Daily Nail that I wanted to do it because I think the effect is really rather stunning, plus it's so simple to do. I was looking at my polishes the other day trying to decide what to use, and randomly picked out a blue and a gold and decided they'd look really cool as stars in the sky-then I knew I had to do this idea.

Polishes used were: London Girl Shade 31, a shiny goldy yellow colour, London Girl Shade 79 which is a clear polish crammed with tiny gold glitters and Maybelline Forever Strong Pro Dark Denim, a lovely midnight blue sort of colour.
I started with three coats of 31, followed by one of 79, and a top coat of Seche Vite.

It's really surprisingly sparkly for a cheap polish
Then I added the stickers and painted over with a thick coat of Dark Denim and peeled them off with tweezers (very fiddly if I stuck the whole sticker to my nail!) and ended up with this:


which I have to say I think is really rather pretty! I like the fact that they're not all the same based on where i put the sticker each time, although my ring finger is definitely my favourite.
I love them! And the best part is you could do this with any combination of colours and it would still look really amazing, but it's so simple. Win-win!


~Nail Art Novice~

Tuesday 26 February 2013

Try Something Tuesdays-Saran Wrap Mani

Try Something Tuesday has rolled around again and I knew exactly what I wanted to do-Saran Wraps-but boy did I underestimate how annoying these would be to get right. I ended up redoing my left hand completely half way through which made me pretty grumpy and I almost wanted to give up on the whole thing. I'm glad I didn't though, I do actually really like the effect even if it was a pain in the bum to get right.
In the UK we don't seem to have access to this mythical Saran Wrap (I don't think) but I watched a couple of videos and it looks like a cross between cling film and cellophane (in that it stays rolled up in a ball if you scrunch it, but is definitely a bit crinklier and not as sticky-to-itself as cling film.). I went hunting around my kitchen for something that would work as effectively-cling film, kitchen foil and kitchen roll were my chosen subjects, and in the end I didn't use any of them! Cling film seems to be too smooth when it's scrunched up, it forms a ball that doesn't have enough rough edges to pick up the polish, foil is good but too sharp in that it punched all the way through my base colour as well, and kitchen roll is useless and fluffy.
I know I've read Saran Wrap tutorials where people used bits of old carrier bag, and was just about to go downstairs again (NB I do my nails in my attic bedroom, the kitchen is a long way away!) to liberate one when I saw something in my room that might work-bubble wrap! Now while it doesn't stay scrunched up in little balls like the rest, I ended up using this because it seemed to give the right effect as well as some slightly interesting patterns from the bubbles themselves, and it was a relief to find something that actually worked properly. I will probably try with carrier bags in the future though.

On to the mani. I knew I wanted a red base and wanted something that would work well with it rather than contrast against it for my top layers so I chose gold and silver metallic polishes. I used Number 7-Siren for my base, it's a very luxurious, proper red colour and applies very nicely. On top of that I used Loreal-Valiant and Colour Me-Pure Gold. These two look lovely together, as neither is a true gold or silver-Valiant is more of a metallic shimmery gun metal, and Pure Gold is a bit tarnished, less yellow than an actual gold colour.


Taken without flash to show that you can see the gold too


These were quite difficult to photograph, think the pattern is a little bit subtle for my camera, nevertheless I did my best. I was going to do the pattern the other way around on my thumb but decided in the end to freehand triangles onto them for ease (and because it was now 1am by this point and I couldn't be bothered any more!)


Overall then, I do like this technique, it gives interesting an fun patterns that are still delicate and subtle enough not to overwhelm, I'll definitely be doing it again only hopefully with less faff next time! At least now I know what works and what doesn't, I guess. I've seen some awesome ones with two layers of colours used on top which also look pretty cool, so I might have a go at that at some point too.

Edit 27/2
Actually the longer I wear this the more I like it, it's really quite pretty in bright light and every nail is different and in dull light you can tell there's a shiny pattern but it's not overwhelming. Ticks all the boxes, will definitely be doing this again!

~Nail Art Novice~

Sunday 24 February 2013

Wishful Thinking

Spring is taking a long time to appear in Britain at the moment and it's really cold. This coupled with the fact that I've got a horrible head cold and am generally feeling a little worse for wear at the moment meant that I wanted something fun to put on my nails that might make me feel a little better. Rara came over the other night and we both decided to do some spring-inspired nail art. We were originally going to do the same thing but had different ideas in the end and did two completely different, but both awesome manis.

Firstly, polishes used:
Rara: Sally Hansen Insta Dry; Brisk Blue, Colour Me; Colour Me White, Barry M; Lemon Ice Cream and L.A. Colours Art DecoBlack
Me: China Glaze; For Audrey, London Girl; Shade 148, Rimmel I Heart Lasting Finish; Tangy Tangerine, Colour Me; Colour Me White, OPI; Suzi Loves Cowboys, Barry M; Mushroom and OPI; Don't Mess With OPI.

Although we didn't copy them exactly, we both took inspiration and techniques from this sky/clouds tutorial by Nailed It NZ and this cut out sunshine one from Gnarly Gnails.

The Manis
I started with For Audrey on all my fingers except for my thumb, which I painted with the yellow London Girl polish. Because I wanted this to be my sun, I sponged some orange on top to change the colour slightly. Next I did the clouds with a dotting tool, then the trees and flowers using nail art brushes and the ones in the polishes. I added a little bit of the lighter brown Mushroom over my Suzi Loves Cowboys to give the trees some texture and stop them being quite so dark before doing the suns as in the tutorial above.


Rara started with a base of Brisk Blue then added the clouds and birds as in the tutorial on all but her accent nails. She painted her suns on using Barry M Lemon Ice Cream which is a paler yellow than the one I used, then added the details again using nail art brushes.


We were a bit bored and messing around and decided that you definitely needed to see some pictures of them both together too (I promise I'm not just crushing her hand in the last one!) and you can see the differences in our nail shapes here, Rara's are much longer and thinner whilst mine are broader but shorter. Both lend themselves well to different styles of art though!


I loved Rara's little birds that looked like they were flying across her nails and the cutout suns impressed me too. I think they look pretty spectacular, both of them, although I'm really sorry to say mine have all but come off now, which is sad. I enjoyed having spring themed nails, even if it was still snowing!

Let us know which one you prefer in the comments!

~Nail Art Novice + Rara ~

Tuesday 19 February 2013

Try Something Tuesdays-Striping Tape

It's time for another Try Something Tuesday post, hasn't time flown since the last one?
This week I'm trying out another really easy technique-using striping tape to create patterns on my nails.
I started with a base of Sally Hansen Insta Dry Brisk Blue which is a frankly AMAZING bright bright blue colour on its own. I had originally planned to team it with Sally Hansen Hard as Nails Xtreme Wear Going Green (from this post) but once I saw it on my nails I realised that the two together would be a bit too clashing and wouldn't really work very well, so I stuck to the one colour in the end.

This is two coats.

It's such a fantastically bright colour-dazzingly blue, it's amazing! The brush was really wide too-I managed to cover most of my nails with one swipe up the middle which doesn't happen very often. Dried pretty quickly too, as its name would suggest. Then I added my striping tape one nail at a time and covered it with a layer of Topshop's Cloud, a creamy grey polish. The first nail I did lifted off all the blue as well, so I went back and topped them all with a coat of Seche Vite and allowed it to dry before trying again. This was much more successful, although I still ended up getting better with practice-hence why you're getting pictures of my right hand today, it's a little neater than my left. It also has slightly longer nails due to cheese slicer related incidents.


Above two pictures taken with flash

Natural Light

I did a different pattern on each of my nails just to try them all out and see which ones I liked.I think I prefer the abstract one on my ring finger and the vertical lines on my little finger the most. It's weird just how much the grey has dulled the amazingness of the blue underneath, it almost looks more turquoise than bright blue now. They're not perfect, but I do think they look quite cool in bright light, in duller lighting they just look kinda tealy/grey and you can't really see the patterns. I almost decided to change my top colour for my right hand, but thought this would probably look even more peculiar so I stuck with the grey and overall it's turned out OK. I wish I had a paler grey though, it might have looked a little better.
Still the technique is pretty easy and not too time consuming for an effect which looks quite striking-I'll definitely be doing this again with different colours.

~Nail Art Novice~


Saturday 16 February 2013

Who Am I?

(Apologies for those of you who are now singing a Les Mis song. I am also singing it, if that helps.)


I thought I should probably tell you a bit about myself. I had originally wanted this blog to be completely anonymous because I have so many friends who would pour scorn on me for doing this/would get fed up of me constantly updating Facebook with pictures of my nails, hence why I'm universally known as 'Nail Art Novice'. However, now I've thought about it a bit, it's always nice to get to know the people behind the nails when reading blogs so I figured I could probably do the same here. 

My name's Jenni, and I live in the UK in little place called Nottingham (yes the Robin Hood town). I'm 22, and have an entirely un-used degree in Biomedical Science from the University of Sheffield. I first really got into doing my nails about 6-8 months ago (early 2012ish) and have rapidly got more obsessed with amazing nail art blogs ever since. Blues and Greens are my favourite colours, and I have far too many of each nestled into my polish collection. You probably won't see much pink appearing on my nails as it's a colour I've always detested, although I do have a few rosy hues for when the time calls for them. If could own any polish I think it'd have to be OPI's Black Spotted because I think it produces a really amazing effect on your nails.

In my personal life, I'm currently learning to play the bass guitar, which is why my nails will always be very short-basically if they're long enough to make a noise if I tap them on things then they're too long to play properly, and much as I love awesome manis, I love my guitar more. I'm a actor/performer whenever I get the chance to be because I love being on stage perhaps a little bit too much a lot and love nothing better than belting my heart out in a spotlight. If I can't do that, I'd happily sit the other side of the curtain too-I just really love everything about theatre. I also love to read and have piles of books haphazardly sitting around my bedroom, waiting for me to delve into them and fall inside one of their stories. I like to write-I've got countless notebooks full of half written, never finished stories because somewhere along the way the inspiration dries up.

I wear excellent socks and awesome T-shirts and definitely have a problematic obsession with Doc Martens (5 pairs and counting) but that's OK really. I love Red Dwarf and Doctor Who and comedies full of obscure British talent that are crammed full of puns that only Brits would get.

Also featuring on this blog is my best mate Rara. We've grown up together and we're almost sisters and have a million and one personal jokes between us that no-one else would get. She wears her nails longer than me because she doesn't play any awkward musical instruments that require short nails, hurrah. She's a terribly bad influence on me when it comes to spending my money on new nail varnishes, but I don't mind really. Every so often she comes around to my house, we watch silly films, drink hot chocolates and paint our nails together, which is always wonderful. In some ways we're very alike, but in others we wildly differ from each other, so hopefully between us you'll be able to see a lot of different things. 

If you are interested in knowing me better then you really should check out my other, non nail varnish related blog, My Every Day Adventure because then you'll find out more than you ever wanted to know about the way my mind works and hopefully have a giggle too. Alternatively, ask me anything by email (nailartnovice@gmail.com) or by Twitter (@NailArtNovice) and I'll do my best to answer you. Feel free to give me any advice on how to improve too-I know that I'm not amazing but I hope to keep on getting better!

Now slightly less obscure and mysterious,

~Nail Art Novice~

Thursday 14 February 2013

Unlike Men, Diamonds Linger

My polka dot Try Something Tuesday manicure didn't last very long, unfortunately-by yesterday I had several chips and a missing thumb nail, so by the end of the day I had picked them all off*, leaving me with naked nails again.
Wanting something simple to and not requiring too much effort, I picked out two of my unused polishes to combine.
Firstly, I chose Revlon's Top Speed Cloud which is a lovely pale pale lilac. It almost looks grey in the bottle, but with 3 coats on, it's definitely more purple. It was still visibly streaky with 2 coats, so I think 3 is needed. Went on nicely though, and dried pretty quickly.

Forgot to clean up again, rubbish
Then I topped it off with the frankly beautiful Luxe and Lush from China Glaze which is an amazing iridescent flaky glitter topper that flashes green, orange, gold, pink and blue as it moves through the light. It was one of those 'must have' polishes when I saw it and I had chosen it and paid for it before I really even realised.

It's so pretty

There is just no way I can photograph this properly. I even stuck my hand out of the window to try and get a picture in the sunlight (THE SUN. I've not seen it in so long, it's so nice.) but even that didn't show how pretty it is. It's like I'm wearing diamonds on my fingers, they catch the light every time I move and twinkle away. You'll have to take my word for it, it's lovely.
Disclaimer: if you don't like heights you might want to avoid my outdoors photo. I'm in an attic bedroom and literally just stuck my hand outside and took a picture so the ground is a long way away. Thought I should just warn you.

Inside, with flash

Outside in the suuuuuuuuuuun.
Simple, quick and really pretty. I'm happy!

Hope you're all having a good Valentine's folks!


~Nail Art Novice~


*Terrible habit, I know, but I can't stand having chipped nails, and it's something of a compulsion...


Title of post taken from Diamonds Are Forever

Tuesday 12 February 2013

Try Something Tuesdays-Going Dotty!

I want to introduce a regular feature to my blog, even though it's only just about a month old. I'm so new to this game that a lot of techniques and styles that seem to be common place to a lot of nail bloggers are still completely alien to me, and I want to get better, I want to get good at this. So I decided to utilise the expertise of my fellow bloggers and start Try Something Tuesdays. Every Tuesday (I hope) I'm going to find a tutorial for a new technique I haven't attempted yet, or a mani I want to attempt to recreate, or even something I want to do from somewhere inside of my own head and try it out, and then post the results. Some might work spectacularly, some might fail in a smeary blobby mess, but I'll keep persevering. I'll keep trying and trying again until I master everything that I want to master and evolve from a Novice into a proficient nail blogger. This is the hope, anyway.

I'm going to start this on my very first week with a polka dot manicure to match my gorgeous black and white rockabilly dress I might be wearing on Valentine's Day (which can be found here on Ebay as I don't have a picture in it yet)

I know this is (in theory) a spectacularly easy thing to master, but I think getting the right number and size of dots is going to be the tricky thing for me-I'm not very good at getting them consistent yet and my practises have ended up looking a little crazy. I'm going for a simple straight line pattern, rather than placing them randomly and hope it turns out a bit better.
I originally was just going to do black and white and keep it monochrome, but my black nail varnish isn't the greatest quality for dotting and I fancied a little splash of colour on my accent nails, which now looks a bit bonkers but I kinda like it.

Polishes used were: Number 17 Fast Finish in Nightshade, Colour Me in Colour Me WhiteRimmel I Heart Lasting Finish in  Block Your Green, Marks and Spencer Nail Colour in Blue (that, can I add, is definitely more purple), Number 7 in Siren (red), and Barry M in Cobalt Blue (which is getting a lot of use at the moment, but I shall try to give it a rest soon). I painted my accents (thumb and ring finger) white, and the rest of my fingers black, then pulled out my dotting tools.
Here's the results:

What's annoying is that I did actually bother cleaning up today.
Clearly I forgot my little finger *shakes fist*


Actually, I quite like them. They do look a little bit mad if I'm honest, and are probably a bit Lichtensteiny rather than true polka dots but they're an improvement on my practises in that they're all roughly the same size and a lot more evenly spaced out. Next time I try this I'll probably opt for the next size up dotting tool and make fewer bigger dots, rather than more smaller ones, as I think it'll look a bit neater overall. For my first Try Something Tuesday though, I'm happy, plus I think they'll look awesome with my dress if I actually get to wear it!

~Nail Art Novice~


Sunday 10 February 2013

Introducing...Rara!

I'm really excited to tell you all that my friend of the awesome ladybird nails post has decided to contribute to my blog from time to time as she doesn't want to start one of her own but still wants to share her designs. Like me, she's fairly new to this whole nail art thing, but she's already braver than me at trying new and interesting things. Rara (as she will be known on this blog) has known me my entire life and we've basically grown up giggling together, so I'm really pleased that she wants to help me out with this project. I'm hoping to get her writing her own posts soon, but for now I'll use her pictures to show you what she's been up to.

So with no further ado, I give you Rara's Water Marbling (her first time trying it,  and my first post about it!):

Polishes used: Avon Plum Seduction, Avon Starry Sky, Barry M Cobalt Blue as well as a Barry M topcoat.

The whole reason she wanted to try Water Marbling was because she found this blog post  by Chloe's Nails showing a step by step photo tutorial of how to successfully water marble, and she decided to have a go. Also, because she's just treated herself to the entire MUA Constellation collection she also did a caviar bead accent nail in the Leo colours. These are designed to have easy applicable bottles, and do look pretty fancy when applied! (Another good thing about these posts from Rara-she does things I don't. I'm not really a fan of textured nail art/polishes on myself, but she likes them, and this way you'll get more variety!)

Here's the results:


Not bad for a first timer, ey! Obviously they aren't perfect as there's a few holes and there are thin patches which aren't opaque but I've definitely seen worse first attempts at such a complicated technique. I'm really impressed with her thumb-the way the silver outlines the purple as if it was drawn on is awesome! And those beads on her accent nail look really pretty too. I know she's really pleased with the mani overall though, as am I, it's a really cool look and definitely on my to do list for when I'm feeling brave.


UPDATE
Between me writing/scheduling this post on Saturday night and it going live on Sunday night, Rara has done another water marble mani with better results, keeping the same beads on her accent nails. This time she substituted the Barry M with another Avon colour-Berry Shimmer, which seems to have worked better with this techinque:


As you can see, there are a lot fewer gaps around the edges of her nails, and (apart from the little finger) she has a lot better patterning across them all. The beads have lasted through washing up, which is pretty impressive considering they're only stuck on with a thin layer of polish and topcoat. You can pick the MUA beads up in Superdrugs (UK) for about £3 each.
Overall, I'm impressed!


~Rara & Nail Art Novice~

Saturday 9 February 2013

Then There's Audrey, Lovely Audrey

Recently, I've acquired rather a lot of polishes and am determined to use them all eventually. Here's two of them-the beautiful 'For Audrey' from China Glaze and the very pretty 'Neptune Sea', one of Barry M's magnetic polishes. I've got two from their magnetic range, and I'm pretty sure (looking at those pictures) that I have managed to get the wrong magnets with both of them but oh well. I like the ones I have better really, so I'm not complaining. I clearly haven't quite got the hang of these yet, in all my practises on some old plastic packaging the patterns came up really nicely but I haven't had as much luck on my nails sadly. Neptune Sea is mostly quite a dark gun metal silver but it has loads of tiny bright blue glittery flecks in it, which makes it really shimmery and pretty.
I've also wanted For Audrey ever since I first saw it-I didn't have any light/sky blues in my collection anyway  and this was gorgeous-slightly on the teal side of blue, more ocean coloured than sky. It was just as lovely when it arrived, thankfully, it's definitely competing for my favourite polish.

This was 3 coats of For Audrey and countless of Neptune Sea (with the fishnet magnet) because I kept putting another layer on top to try and get the pattern more developed. Probably ended up with between 3 and 5 layers on each nail.

You can see that in this pic Neptune Sea looks more blue than silver-
there's that much glitter/magnety magic in it.

The flash has bleached For Audrey a little, she's a bit more greeny IRL
As I said, I still need to get the hang of the magnetic polish, my best result (and only full nail showing the pattern) is on my right middle finger:
Which of course I forgot to clean up before I took pictures of it...sorry!

You can't really tell in this photo, but the pattern goes all the way
across, promise!
I've got quite a good one on my right thumb too, but it's only on half the nail...not sure how I managed that. I've seen some awesome swatches by other bloggers though, so I know that it IS possible to get a good strong pattern on each nail. I shall persevere and practise more and hopefully next time I try them it'll be a little better!


What are your opinions on magnetic polishes? Did you have any more success than me and have any hints? Let me know =)

~Nail Art Novice~


Title of post taken from the wonderful Little Shop of Horrors-Meek Shall Inherit

Wednesday 6 February 2013

LGBT History Month Inspired Mani

In the UK, the month of February is recognised as LGBT History Month-celebrating the achievements and lives of LGBT people throughout history and today, which I think is a pretty important thing. Possibly even more important is that this is part of a larger scheme of charities and support groups working to help LGBT people, charities like Schools Out, working to eradicate homophobia and transphobia in schools and aiming to make them more inclusive.
In this month of saccharine sweet candy hearts, fluffy teddy bears and enormous bunches of roses, it's also worth remembering that around the world people are still fighting for the basic human right to love whoever they want to without fear of any repercussions, to be the person they've always felt like inside with the support of their governments, to marry the person they want to spend their lives with without people telling them it's wrong and immoral.
Though I myself am not LGBorT, the fight for equality and respect for all is one I fully stand behind because at the end of the day it doesn't matter if the person you love is the same or opposite gender to you, if you feel like you were born in the wrong body or the right one-we're all people. We should all be able to live and love as we choose to, and all be recognised for the awesome human beings that we are.

In celebration of LGBT history month and the fact that the UK is now one step closer to allowing gay marriage (hurrah!), I've done a mani based on their rainbow logo.
I started by painting my little, middle and index fingers with 2 coats of Barry M's Black Multi Glitter, followed by a top coat of Seche Vite as normal. Then I started my rainbow accents in a myriad of polishes:

Rimmel I Heart Lasting Finish in Double Decker Red, 
Rimmel I Heart Lasting Finish in Tangy Tangerine, 
London Girl
in Shade 148, OPI in Don't Mess With OPI
Barry M
in Cobalt Blue, Rimmel 60 seconds in Blue My Mind, 
Topcoat of  Rimmel I Heart Lasting Finish in Disco Ball
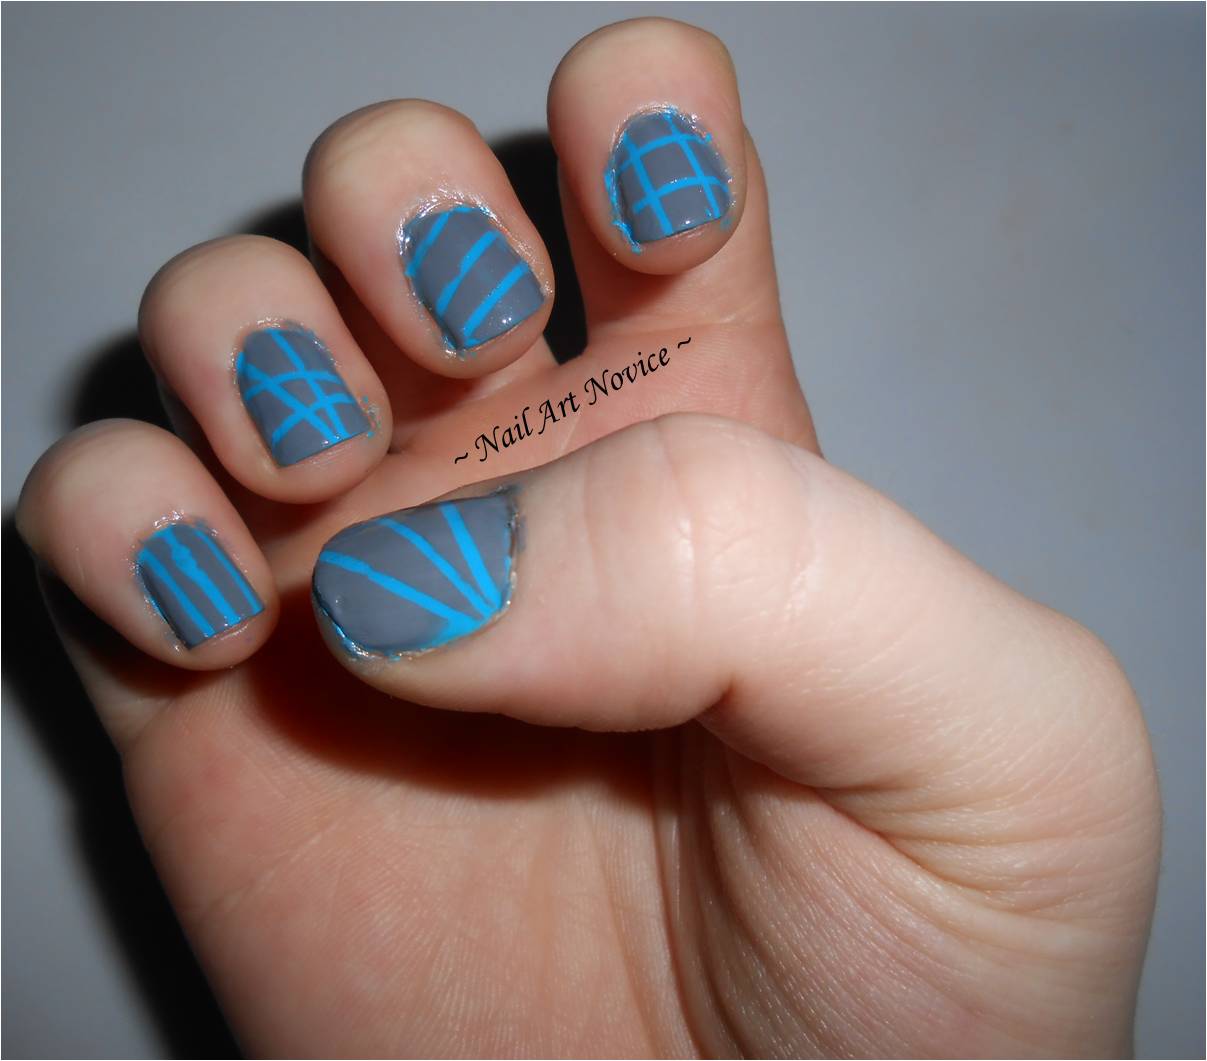
I'm sure there must have been an easier method than the one I used, which was ridiculous really-I taped off a small section of my nails and painted 2 coats of starting colour and waited for them to dry, then moved the tape up a little and started on the next colour. It took FOREVER and left me with a lumpy finish in stripes across my nail.

As you can see here...
After waiting an age for all the layers to dry naturally (as I didn't want to smudge them with top coat!) I added a layer of the glittery Disco Ball polish to add a little bit of extra sparkle and shine to my rainbows, followed by 2 coats of Seche Vite to take me to a (mostly) smooth finish. 
To be honest I really love how this turned out, even if it did take me hours. I've always loved rainbows and think they look really awesome on my nails-I'm just glad I only did accents as I was originally planning a full set!

The final effect!

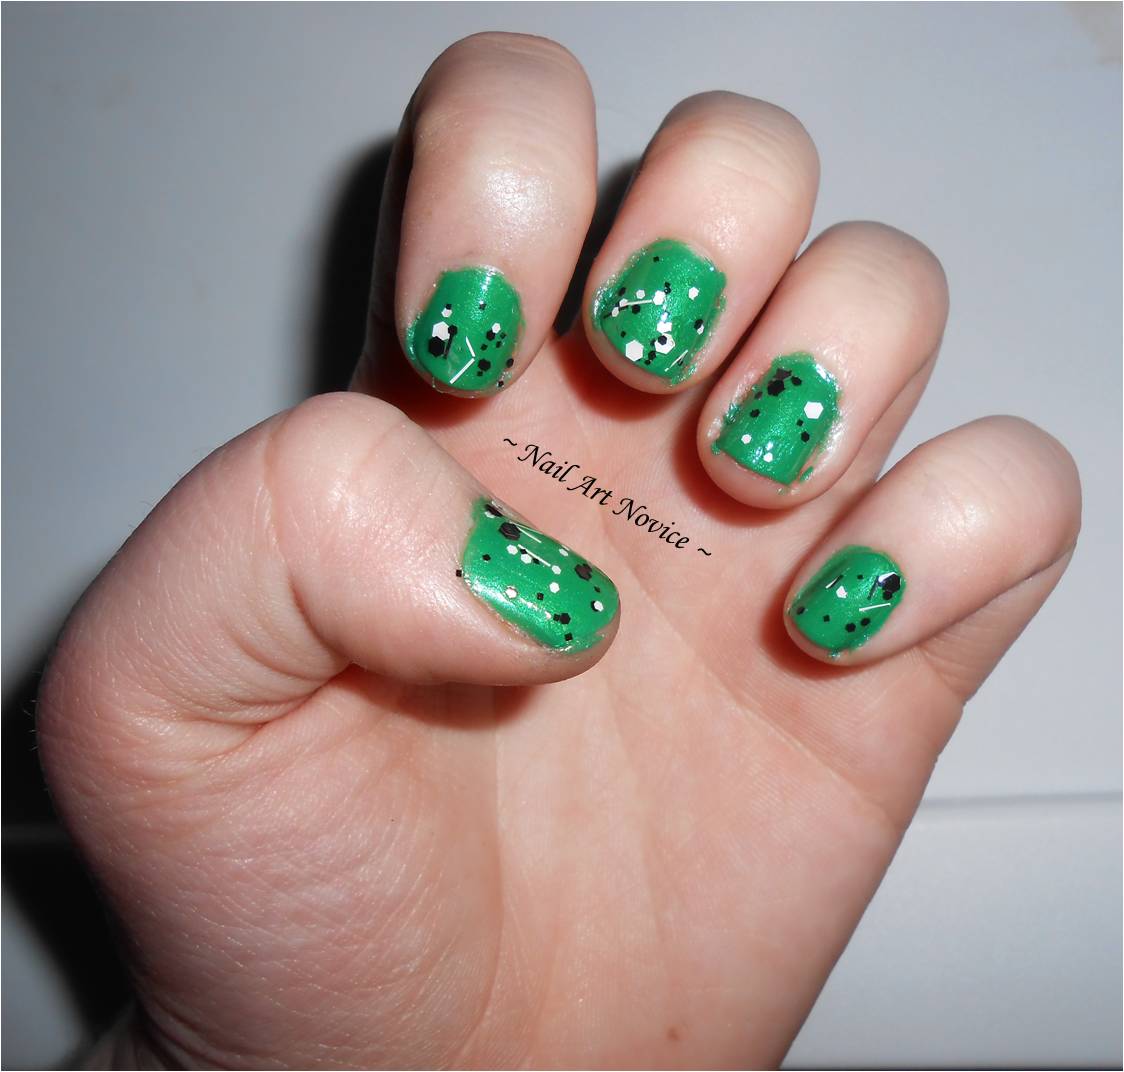
Only including this one to show how lovely the black Barry M is too,
it's very sparkly and multicoloured.
I did each hand in opposite colours so that they're slightly different-here's a comparison shot of my thumbs so you get what I mean:
I like the fact they're not exactly the same =)
I'm not sure I could love this mani any more if I tried-it's amazing. By far the most complicated thing I've ever attempted but with the best results!

Hope you like it as much as I do!

~Nail Art Novice~

NB: I am entering this mani in The Crumpet's Amateur Nail Art contest this month. The theme is Love & Heartbreak, and I realise this doesn't really fit but it was inspired by a movement all about love so I'm going to enter anyway. Beautifully manicured fingers crossed!


Tuesday 5 February 2013

Friendly Flowers

As I mentioned in my last post, that mani was created on a night where my friend did something rather more impressive that she's allowed me to share with you.
She's always loved ladybirds and when I happened to come across this beautiful ladybird/ladybug mani over at The Little Canvas I sent it to her because I knew she'd want to try it out. Alongside that she decide she wanted to some dotting tool flowers because she didn't want red polish on all of her nails. We practised together on a bit of old plastic packaging and were both surprised how easy the technique was to pick up and how effective it looked!
In total she used 8 polishes on her fingers, not including the base coat and top coat!


They were from L-R:
Number 17 Fast Finish in Nightshade, Rimmel I Heart Lasting Finish in  Block Your Green, Colour Me in Colour Me White, London Girl in un-named shade 148, Barry M in Cobalt BlueRimmel I Heart Lasting Finish in Double Decker Red, L.A Colors Art Deco in Black and a top coat of Rimmel I Heart Lasting Finish in Disco Ball. Phew! It was definitely worth it though because the results looked awesome! She kept The Little Canvas mani open for reference and then just freehanded her designs using the brushes in the polishes or dotting tools, and this was the result:


To say she's never really done anything like this before (neither have I for that matter) I was really impressed with how well this turned out and will definitely be trying both of these techniques soon. The design is so fun and bright, I know she's really pleased with it and so am I!

~Nail Art Novice + Friend~


Sunday 3 February 2013

Unconnected Dots

I want to start this post with a little story, if you don't mind of course. A while ago I saw on a nail art/fashion blog I was browsing (which I'm sad to say has since been closed down) Lyndarella's Connect the Dots and I don't think I've ever wanted a polish as much as I wanted that one. I just loved the way it gave was was an otherwise plain coloured manicure a whole different dimension-it looks awesome and you can wear it with literally any colour/pattern and it still looks great. I set about scouring the internet for it, but (as I'm sure many of you will know) it's almost impossible to find, especially for UK based bloggers. So instead I went to Etsy and typed in 'black and white glitter polish' to see what I could come up with-there were hundreds.Of course I bought one, from an Australian Etsy shop called EmilydeMolly and then sat and waited impatiently for it to arrive, and finally, finally, it did.

As I said, this was all months ago, but it still remains one of my favourite glitter toppers because even the simplest of colours is transformed when you wear it.
On then, to the mani:

Every so often my best mate comes over and we watch silly films, drink hot chocolate, do face masks and paint our nails together, and it's delightfully silly and wonderful. Last night was such a night, and while she was busy doing some impressive looking but deceptively simple nail art on her fingers (post to come) I stuck with a simple manicure because I knew exactly what I wanted.
I used Sally Hansen Hard as Nails Xtreme Wear in Going Green, topped off with a coat of the gorgeous A Black and White Love Affair by EmilydeMolly. 
Going Green is a really lushiously bright grass green, with a very slight shimmer. A Black and White Love Affair is a B+W glitter topper with bar glitters, hexagonal and square glitters and is a twin for the Lyndarella polish I lusted after-thumbs up!


The pictures really don't do this colour justice, it's SO green. Think of your lawn on a really bright sunny day- it's that kind of colour, with a very subtle shimmer to it. And of course it looks even more amazing with the black and white blobs on top. This is another mani that makes me really happy, I just like to enjoy my slightly zany looking fingers, and it feels like spring is just around the corner wearing this colour.

Marvellous.

~Nail Art Novice~
Related Posts Plugin for WordPress, Blogger...