Hello lovelies!
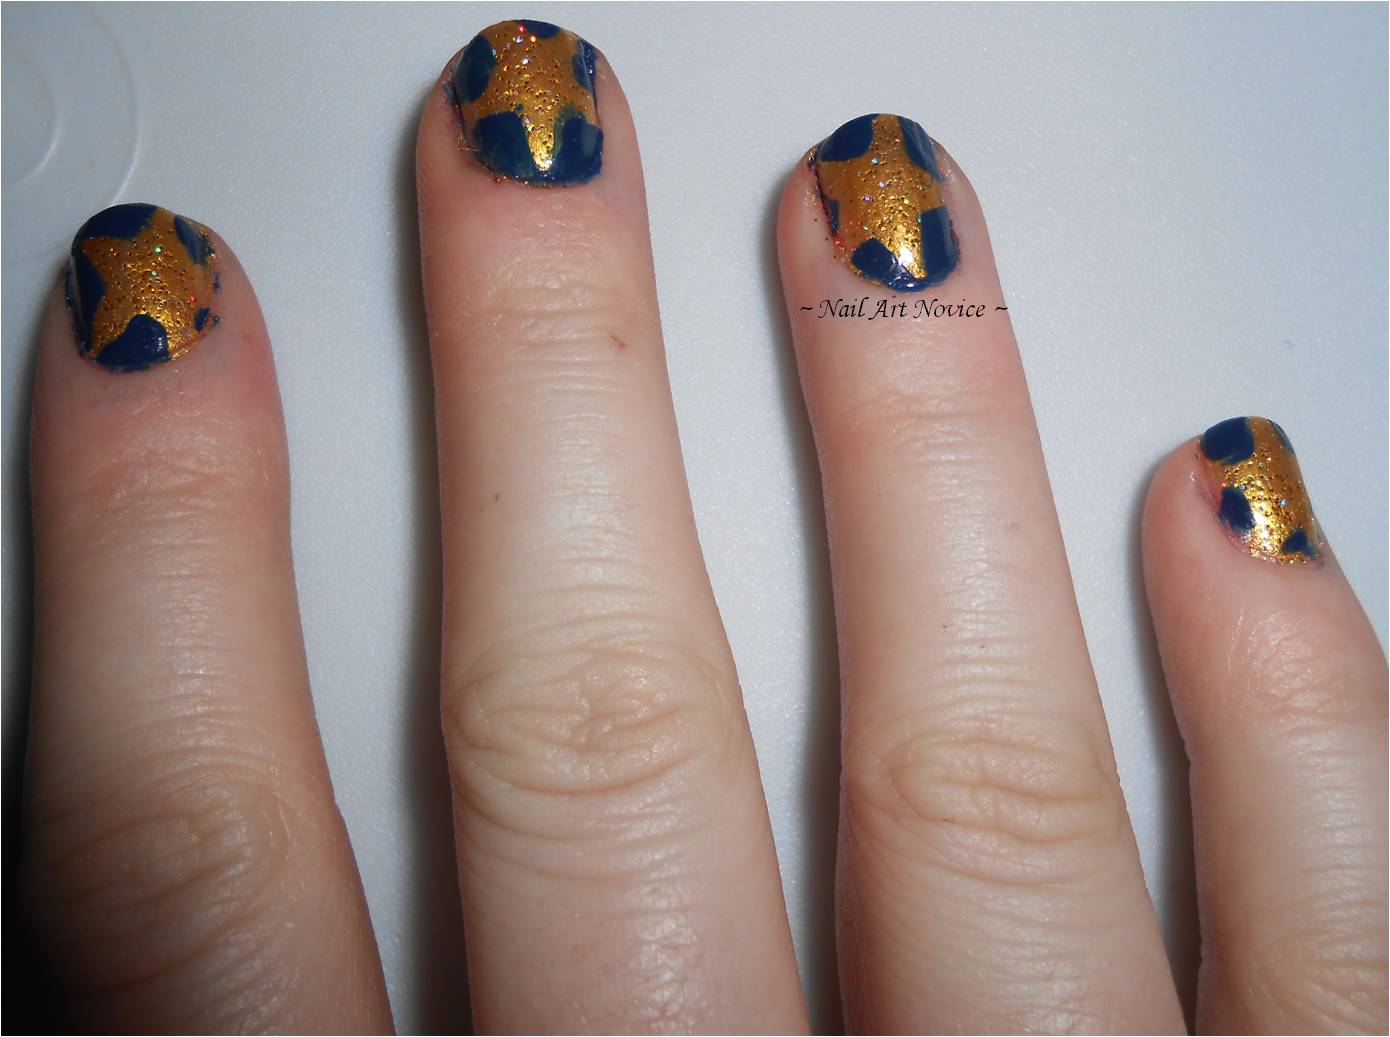
Back today with my second Glitter Me Monday and this one is my boyfriend's choice-both of polish and design. This week's GMM is Barielle-Falling Star which I have had for ages and I don't know why I've never got around to using yet-it's gorgeous! It's a cornflower blue base with bronze glitters in and it's so sparkly and pretty! I've layered it over a London Girl polish, which is one of my frankly awful smelly-never-drying ones, but it does match the glitter exactly so I decided to grin and bear it this time. My boyfriend decided that 2 stripes per nail were the perfect number and I have to say I agree with him-he's got an eye for nail art haha!
What do you reckon? I really like it, especially with the bronze flashes underneath. He's got very good taste, my fella!
Don't forget I have a GIVEAWAY going on at the moment, and it's ending really soon! Make sure you get your Rafflecopter entries in here and you can also enter on instagram here by reposting the pic with the tag #nangiveaway -I've not had many entries this way so make sure you tag it!
Good luck and Happy Monday!
~Nail Art Novice~
Showing posts with label London Girl. Show all posts
Monday, 11 August 2014
Sunday, 12 January 2014
Mish Mash Challenge Week 24-Inspired By A Decade
Finally, finally, I'm back with another Mish Mash mani-there's still a fair few to go before the end of the challenge! This one was one of my suggestions-inspired by a decade-and I've always known what I wanted to do for it! First I should perhaps show you my inspiration, my faaaaaaabulous 70s glam rock boots:
Haha, I love these babies! You can't help but strut when you wear them! I decided to combine some nail art based on them with some retro 70s style wallpaper, with a little help from this tutorial by Holy Grail Nails. I've had this bookmarked to do since I first got into blogging, can't believe it's taken so long!
Polishes used: Rimmel-Azure, London Girl-#46, Revlon-Silver Screen, Barry M-Navy, Barry M-Lady.
Love these! I think they work on two levels-while they are quite retro I also think the colours look a little "futuristic"-like what they thought the 2000s were going to look like in old 80s films and stuff.
Glad to be back with the Mish Mashers!
~Nail Art Novice~
Haha, I love these babies! You can't help but strut when you wear them! I decided to combine some nail art based on them with some retro 70s style wallpaper, with a little help from this tutorial by Holy Grail Nails. I've had this bookmarked to do since I first got into blogging, can't believe it's taken so long!
Polishes used: Rimmel-Azure, London Girl-#46, Revlon-Silver Screen, Barry M-Navy, Barry M-Lady.
Love these! I think they work on two levels-while they are quite retro I also think the colours look a little "futuristic"-like what they thought the 2000s were going to look like in old 80s films and stuff.
Glad to be back with the Mish Mashers!
~Nail Art Novice~
Labels:
Barry M,
Blues,
London Girl,
Mish Mash Challenge,
Retro,
Revlon,
Rimmel,
Stars
Saturday, 21 December 2013
12 Days Of Xmas Nail Art 11-Christmas Trees
Squeezing this post in before the end of Saturday so I can still claim to have posted on time, haha. I've been visiting my boyfriend today so haven't been able to post yet.
The penultimate Xmas challenge mani! Boo! I've had such fun doing these every day and sharing the challenge with some awesome ladies. For 'Christmas trees' I've known what I wanted to do ever since way back when in Metallic week of the Mish Mash challenge. I festived them up a bit but that's where the idea came from.
Polishes used: GOSH-Holographic Hero (not that you can really see the holo any more, many layers of topcoat killed it. It did look pretty awesome to begin with though!), Barry M-Cosmic Glow (magnetic), Maybelline-Winner Takes It All, London Girl Polish-#79, Rimmel-Red Carpet and Barry M-Teal. I added some gems that I won in a giveaway prize because hey, it's Christmas, and I fancied trying something different. Amazed how well they've stayed on actually!
These are fun! I did find the gems a bit weird at first because I wasn't used to having 3D things on my nails but I forgot about them fairly quickly. These make me feel VERY festive!
Rara
Polishes used: Base of Layla-Mermaid Spell, thumb xmas tree; nail art pen with Tara's Talons-12 Days over the top, index finger; Avon-Noir Emerald with nail art pen decorations, middle finger: Essie-Mojito Madness with Tara's Talons-Bauble over the top, ring finger; Avon-Garden Green mixed with Sinful Colors-Pistache with Andrea Fulerton silver nail pen for tinsel and little finger; as before. All trees have Avon-Express Mocha stumps and yellow nail pen stars.
I am very surprised how many greens I actually have as I don't really like green!! I like how all of my trees are different and my favourite two have to be the ones on my thumb and index fingers!
Really sad that we only have one more mani left to do :'(
~Rara~
I'm also quite sad we've only got one left-it's been a really fun month trying to organise these around my life haha! Don't forget to check out the other ladies trees in the inlinkz. I'll be back on Monday with the FINAL mani, booo!
~Nail Art Novice~
The penultimate Xmas challenge mani! Boo! I've had such fun doing these every day and sharing the challenge with some awesome ladies. For 'Christmas trees' I've known what I wanted to do ever since way back when in Metallic week of the Mish Mash challenge. I festived them up a bit but that's where the idea came from.
Polishes used: GOSH-Holographic Hero (not that you can really see the holo any more, many layers of topcoat killed it. It did look pretty awesome to begin with though!), Barry M-Cosmic Glow (magnetic), Maybelline-Winner Takes It All, London Girl Polish-#79, Rimmel-Red Carpet and Barry M-Teal. I added some gems that I won in a giveaway prize because hey, it's Christmas, and I fancied trying something different. Amazed how well they've stayed on actually!
These are fun! I did find the gems a bit weird at first because I wasn't used to having 3D things on my nails but I forgot about them fairly quickly. These make me feel VERY festive!
Rara
Polishes used: Base of Layla-Mermaid Spell, thumb xmas tree; nail art pen with Tara's Talons-12 Days over the top, index finger; Avon-Noir Emerald with nail art pen decorations, middle finger: Essie-Mojito Madness with Tara's Talons-Bauble over the top, ring finger; Avon-Garden Green mixed with Sinful Colors-Pistache with Andrea Fulerton silver nail pen for tinsel and little finger; as before. All trees have Avon-Express Mocha stumps and yellow nail pen stars.
I am very surprised how many greens I actually have as I don't really like green!! I like how all of my trees are different and my favourite two have to be the ones on my thumb and index fingers!
Really sad that we only have one more mani left to do :'(
~Rara~
I'm also quite sad we've only got one left-it's been a really fun month trying to organise these around my life haha! Don't forget to check out the other ladies trees in the inlinkz. I'll be back on Monday with the FINAL mani, booo!
~Nail Art Novice~
Tuesday, 16 July 2013
OMD! Challenge Day 16-Half Moons
Yesterday I was having a bit of a crappy day so I decided to shut myself away with a film that always makes me happy (WALL-E-I just adore that little robot with the enormous heart!) and do my nails because I always find that helps me stress bust. I chose to do half moons instead of ruffians because I wanted something that would take me a while to do and that I had to concentrate on. I was going to do all owls again, but decided to do a mix of 'night time' creatures instead. I've got a badger, a cat, a fox and an owl, with a cheeky half moon (see what I did there) on my little fingers.
Polishes used: Barry M-Black, Matt White, Lychee, Mango, Mushroom, Rimmel-Midnight Blue, Rose Libertine, Collection-Look At Me! and London Girl-# 70 plus the Barry M nail art pens in Black,White and Silver.
I really need to get myself some of those ring binder re-enforcer sticker things, as I had to freehand on all these half moons and they're all a bit wibbly as a result!
I'm not too sure about the cat's whiskers but it didn't look right without them. Otherwise I really love these nails-they're super fun and more importantly made me feel MUCH better once they were finished-Phew! I'm rather getting into this new mani every couple of days business, oops! Haha.
~Nail Art Novice~
Monday, 24 June 2013
ABC Challenge: X is for X Marks The Spot
I had a really great idea for these nails but it just didn't translate well, probably due to my poor art skills! I wanted this to be like an old treasure map with X marking the spot and a trail to follow but I'm not sure how well it's turned out.
Polishes used: Barry M-Lychee as a base colour with London Girl-# 95 sponged on top. For the details I used a dotting tool and OPI-Suzi Loves Cowboys. From little finger to thumb it's supposed to be a compass point, a ship, a dotted line trail and an island with X marking the spot for treasure. My right hand just has waves and an island because by this point I was rather tired and couldn't be bothered repeating all the details with my non-dominant hand.
I'm just not feeling this really. It feels weird having such neutral colours on my nails and I don't think the nail art is the best I've ever done. Be sure to check out the other ladies in the inlinkz collection for some much better x-amples (haha) of 'X'!
~Nail Art Novice~
Polishes used: Barry M-Lychee as a base colour with London Girl-# 95 sponged on top. For the details I used a dotting tool and OPI-Suzi Loves Cowboys. From little finger to thumb it's supposed to be a compass point, a ship, a dotted line trail and an island with X marking the spot for treasure. My right hand just has waves and an island because by this point I was rather tired and couldn't be bothered repeating all the details with my non-dominant hand.
I'm just not feeling this really. It feels weird having such neutral colours on my nails and I don't think the nail art is the best I've ever done. Be sure to check out the other ladies in the inlinkz collection for some much better x-amples (haha) of 'X'!
~Nail Art Novice~
Labels:
ABC Challenge,
Barry M,
Browns,
London Girl,
Nail Art,
OPI
Saturday, 27 April 2013
Night Time Is The Right Time
A week or so ago Rara told me about a contest on Avon's Connect site for night time nails (here, hopefully) and I really wanted to enter but couldn't really think of much that I would be able to pull off well (I was going to do my owls again but wanted something different as it was so soon!).
That all changed when I received some surprise nail mail from my friend! He'd borrowed my Barry M nail pen at the weekend to decorate his girlfriend's nails with and ended up using it much more than I had so he offered to buy me a new one. When the package turned up yesterday, not only was there a black pen but also a silver one and Barry M's Gold Foil Effects-I've been thoroughly spoilt! Having the silver pen made all the difference to this mani!
Polishes used: Rimmel-Midnight Blue (the darker of the two blues), Barry M-Denim, London Girl-Unknown (The sticker's come off the bottom! It's a very sheer pearly white), Collection 2000-Look At Me!, Barry M-Black, plus the Barry M nail art pens in black and silver, and a little bit of glow in the dark glitter polish called Astral Lights that I've had for YEARS. I actually only ended up using the London Girl polish on my thumb because I had forgotten how awful the formula was-it takes forever to dry and needs lots of layers to build up to a decent colour. All the rest of the details were done with my silver Barry M pen instead!
I rather like them, but I couldn't have done them without a lot of help from Mr. Barry Mero and his wonderful nail art pens (and of course my lovely friend who bought them for me!)
EDIT: Asked Rara what she thought of my owls, and she said she thought they were cats! Made me laugh, oh dear =p
Tata
~Nail Art Novice~
Don't forget to check out the British Nail Blogger ladies this week:
That all changed when I received some surprise nail mail from my friend! He'd borrowed my Barry M nail pen at the weekend to decorate his girlfriend's nails with and ended up using it much more than I had so he offered to buy me a new one. When the package turned up yesterday, not only was there a black pen but also a silver one and Barry M's Gold Foil Effects-I've been thoroughly spoilt! Having the silver pen made all the difference to this mani!
Polishes used: Rimmel-Midnight Blue (the darker of the two blues), Barry M-Denim, London Girl-Unknown (The sticker's come off the bottom! It's a very sheer pearly white), Collection 2000-Look At Me!, Barry M-Black, plus the Barry M nail art pens in black and silver, and a little bit of glow in the dark glitter polish called Astral Lights that I've had for YEARS. I actually only ended up using the London Girl polish on my thumb because I had forgotten how awful the formula was-it takes forever to dry and needs lots of layers to build up to a decent colour. All the rest of the details were done with my silver Barry M pen instead!
| This really shows how good those pens were-this was done with my left hand and still looks OK! |
| Just to prove they glow |
I rather like them, but I couldn't have done them without a lot of help from Mr. Barry Mero and his wonderful nail art pens (and of course my lovely friend who bought them for me!)
EDIT: Asked Rara what she thought of my owls, and she said she thought they were cats! Made me laugh, oh dear =p
Tata
~Nail Art Novice~
Don't forget to check out the British Nail Blogger ladies this week:
Tuesday, 12 March 2013
Try Something Tuesdays-Water Decals
I recently discovered YRNails water decals on Geordie Nails' blog and decided to treat myself and Rara to some (although Rara has only just discovered this and doesn't know which ones I've got her yet =p) because they have some really awesome designs but at prices which won't break the bank.
I got both the transparent designs and some full decals but this mani uses the partial ones, and I'm leaving the full ones for a braver day!
I had a couple of practises and they're fiddly little things so not great for someone like me who's clumsy and uncoordinated but I managed. They're not perfect but they still look really cool.
I chose these comic book style 'Pow' ones for my first time using them, and put them over what I consider to be "classic" comic colours-black, white, red, yellow and blue
Polishes used were the usual suspects: L.A Colors Art Deco-Black, Colour Me-Colour Me White, No 7-Siren, London Girl-Shade 148 and Barry M-Cobalt Blue.
I think these decals look really cool and I'm loving the retro feel to this mani. I was expecting them to be sticky once you removed the backing paper from them, but they aren't which means you can move them around until you are happy with their placing and then top coat the hell out of them to get them to stay there. They're not perfectly flat on my nails but I think that's more because I didn't cut them out perfectly so the edges have lifted slightly/because I didn't dry them all very well. You get 18 designs per pack, so I still have enough left to do a full mani if I wanted to-very good value for money at a pound a pack!
I think they're brill and will definitely be buying from them again in the future, as well as trying out my full patterned decals at some point too.
~Nail Art Novice~
Ooh and as a bonus here's a picture of one of my practice attempts over my mint nails:
I got both the transparent designs and some full decals but this mani uses the partial ones, and I'm leaving the full ones for a braver day!
I had a couple of practises and they're fiddly little things so not great for someone like me who's clumsy and uncoordinated but I managed. They're not perfect but they still look really cool.
I chose these comic book style 'Pow' ones for my first time using them, and put them over what I consider to be "classic" comic colours-black, white, red, yellow and blue
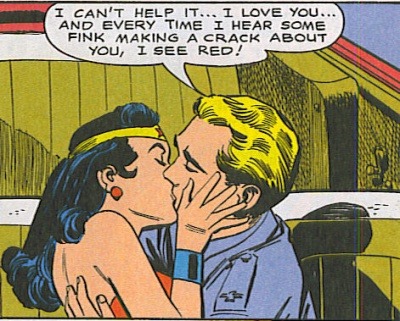
| Like this...can't understand how he's talking AND kissing her at the same time though... (Via) |
I didn't want to waste a decal on a black polish so I did something a little different on my accent nails.
| I was going to write 'POW' in my bubble but my nails are just too teeny & I'm not that skilled! I like the exclamation mark too though. |
I think these decals look really cool and I'm loving the retro feel to this mani. I was expecting them to be sticky once you removed the backing paper from them, but they aren't which means you can move them around until you are happy with their placing and then top coat the hell out of them to get them to stay there. They're not perfectly flat on my nails but I think that's more because I didn't cut them out perfectly so the edges have lifted slightly/because I didn't dry them all very well. You get 18 designs per pack, so I still have enough left to do a full mani if I wanted to-very good value for money at a pound a pack!
I think they're brill and will definitely be buying from them again in the future, as well as trying out my full patterned decals at some point too.
~Nail Art Novice~
Ooh and as a bonus here's a picture of one of my practice attempts over my mint nails:
I thought he was too cute not to share really.
Thursday, 28 February 2013
Star Spangled
I think I'm in love again, this mani is really really awesome. I knew as soon as I saw this post from The Daily Nail that I wanted to do it because I think the effect is really rather stunning, plus it's so simple to do. I was looking at my polishes the other day trying to decide what to use, and randomly picked out a blue and a gold and decided they'd look really cool as stars in the sky-then I knew I had to do this idea.
Polishes used were: London Girl Shade 31, a shiny goldy yellow colour, London Girl Shade 79 which is a clear polish crammed with tiny gold glitters and Maybelline Forever Strong Pro Dark Denim, a lovely midnight blue sort of colour.
I started with three coats of 31, followed by one of 79, and a top coat of Seche Vite.
Then I added the stickers and painted over with a thick coat of Dark Denim and peeled them off with tweezers (very fiddly if I stuck the whole sticker to my nail!) and ended up with this:
which I have to say I think is really rather pretty! I like the fact that they're not all the same based on where i put the sticker each time, although my ring finger is definitely my favourite.
I love them! And the best part is you could do this with any combination of colours and it would still look really amazing, but it's so simple. Win-win!
~Nail Art Novice~
Polishes used were: London Girl Shade 31, a shiny goldy yellow colour, London Girl Shade 79 which is a clear polish crammed with tiny gold glitters and Maybelline Forever Strong Pro Dark Denim, a lovely midnight blue sort of colour.
I started with three coats of 31, followed by one of 79, and a top coat of Seche Vite.
| It's really surprisingly sparkly for a cheap polish |
which I have to say I think is really rather pretty! I like the fact that they're not all the same based on where i put the sticker each time, although my ring finger is definitely my favourite.
I love them! And the best part is you could do this with any combination of colours and it would still look really amazing, but it's so simple. Win-win!
~Nail Art Novice~
Sunday, 24 February 2013
Wishful Thinking
Spring is taking a long time to appear in Britain at the moment and it's really cold. This coupled with the fact that I've got a horrible head cold and am generally feeling a little worse for wear at the moment meant that I wanted something fun to put on my nails that might make me feel a little better. Rara came over the other night and we both decided to do some spring-inspired nail art. We were originally going to do the same thing but had different ideas in the end and did two completely different, but both awesome manis.
Firstly, polishes used:
Rara: Sally Hansen Insta Dry; Brisk Blue, Colour Me; Colour Me White, Barry M; Lemon Ice Cream and L.A. Colours Art Deco; Black
Me: China Glaze; For Audrey, London Girl; Shade 148, Rimmel I Heart Lasting Finish; Tangy Tangerine, Colour Me; Colour Me White, OPI; Suzi Loves Cowboys, Barry M; Mushroom and OPI; Don't Mess With OPI.
Although we didn't copy them exactly, we both took inspiration and techniques from this sky/clouds tutorial by Nailed It NZ and this cut out sunshine one from Gnarly Gnails.
The Manis
I started with For Audrey on all my fingers except for my thumb, which I painted with the yellow London Girl polish. Because I wanted this to be my sun, I sponged some orange on top to change the colour slightly. Next I did the clouds with a dotting tool, then the trees and flowers using nail art brushes and the ones in the polishes. I added a little bit of the lighter brown Mushroom over my Suzi Loves Cowboys to give the trees some texture and stop them being quite so dark before doing the suns as in the tutorial above.
Rara started with a base of Brisk Blue then added the clouds and birds as in the tutorial on all but her accent nails. She painted her suns on using Barry M Lemon Ice Cream which is a paler yellow than the one I used, then added the details again using nail art brushes.
I loved Rara's little birds that looked like they were flying across her nails and the cutout suns impressed me too. I think they look pretty spectacular, both of them, although I'm really sorry to say mine have all but come off now, which is sad. I enjoyed having spring themed nails, even if it was still snowing!
Let us know which one you prefer in the comments!
~Nail Art Novice + Rara ~
Firstly, polishes used:
Rara: Sally Hansen Insta Dry; Brisk Blue, Colour Me; Colour Me White, Barry M; Lemon Ice Cream and L.A. Colours Art Deco; Black
Me: China Glaze; For Audrey, London Girl; Shade 148, Rimmel I Heart Lasting Finish; Tangy Tangerine, Colour Me; Colour Me White, OPI; Suzi Loves Cowboys, Barry M; Mushroom and OPI; Don't Mess With OPI.
Although we didn't copy them exactly, we both took inspiration and techniques from this sky/clouds tutorial by Nailed It NZ and this cut out sunshine one from Gnarly Gnails.
The Manis
I started with For Audrey on all my fingers except for my thumb, which I painted with the yellow London Girl polish. Because I wanted this to be my sun, I sponged some orange on top to change the colour slightly. Next I did the clouds with a dotting tool, then the trees and flowers using nail art brushes and the ones in the polishes. I added a little bit of the lighter brown Mushroom over my Suzi Loves Cowboys to give the trees some texture and stop them being quite so dark before doing the suns as in the tutorial above.
Rara started with a base of Brisk Blue then added the clouds and birds as in the tutorial on all but her accent nails. She painted her suns on using Barry M Lemon Ice Cream which is a paler yellow than the one I used, then added the details again using nail art brushes.
We were a bit bored and messing around and decided that you definitely needed to see some pictures of them both together too (I promise I'm not just crushing her hand in the last one!) and you can see the differences in our nail shapes here, Rara's are much longer and thinner whilst mine are broader but shorter. Both lend themselves well to different styles of art though!
Let us know which one you prefer in the comments!
~Nail Art Novice + Rara ~
Wednesday, 6 February 2013
LGBT History Month Inspired Mani
In the UK, the month of February is recognised as LGBT History Month-celebrating the achievements and lives of LGBT people throughout history and today, which I think is a pretty important thing. Possibly even more important is that this is part of a larger scheme of charities and support groups working to help LGBT people, charities like Schools Out, working to eradicate homophobia and transphobia in schools and aiming to make them more inclusive.
In this month of saccharine sweet candy hearts, fluffy teddy bears and enormous bunches of roses, it's also worth remembering that around the world people are still fighting for the basic human right to love whoever they want to without fear of any repercussions, to be the person they've always felt like inside with the support of their governments, to marry the person they want to spend their lives with without people telling them it's wrong and immoral.
Though I myself am not LGBorT, the fight for equality and respect for all is one I fully stand behind because at the end of the day it doesn't matter if the person you love is the same or opposite gender to you, if you feel like you were born in the wrong body or the right one-we're all people. We should all be able to live and love as we choose to, and all be recognised for the awesome human beings that we are.
In celebration of LGBT history month and the fact that the UK is now one step closer to allowing gay marriage (hurrah!), I've done a mani based on their rainbow logo.
I started by painting my little, middle and index fingers with 2 coats of Barry M's Black Multi Glitter, followed by a top coat of Seche Vite as normal. Then I started my rainbow accents in a myriad of polishes:
I did each hand in opposite colours so that they're slightly different-here's a comparison shot of my thumbs so you get what I mean:
Hope you like it as much as I do!
~Nail Art Novice~
In this month of saccharine sweet candy hearts, fluffy teddy bears and enormous bunches of roses, it's also worth remembering that around the world people are still fighting for the basic human right to love whoever they want to without fear of any repercussions, to be the person they've always felt like inside with the support of their governments, to marry the person they want to spend their lives with without people telling them it's wrong and immoral.
Though I myself am not LGBorT, the fight for equality and respect for all is one I fully stand behind because at the end of the day it doesn't matter if the person you love is the same or opposite gender to you, if you feel like you were born in the wrong body or the right one-we're all people. We should all be able to live and love as we choose to, and all be recognised for the awesome human beings that we are.
In celebration of LGBT history month and the fact that the UK is now one step closer to allowing gay marriage (hurrah!), I've done a mani based on their rainbow logo.
I started by painting my little, middle and index fingers with 2 coats of Barry M's Black Multi Glitter, followed by a top coat of Seche Vite as normal. Then I started my rainbow accents in a myriad of polishes:
| As you can see here... |
After waiting an age for all the layers to dry naturally (as I didn't want to smudge them with top coat!) I added a layer of the glittery Disco Ball polish to add a little bit of extra sparkle and shine to my rainbows, followed by 2 coats of Seche Vite to take me to a (mostly) smooth finish.
To be honest I really love how this turned out, even if it did take me hours. I've always loved rainbows and think they look really awesome on my nails-I'm just glad I only did accents as I was originally planning a full set!
| The final effect! |
| Only including this one to show how lovely the black Barry M is too, it's very sparkly and multicoloured. |
![]() |
| I like the fact they're not exactly the same =) |
I'm not sure I could love this mani any more if I tried-it's amazing. By far the most complicated thing I've ever attempted but with the best results!
Hope you like it as much as I do!
~Nail Art Novice~
NB: I am entering this mani in The Crumpet's Amateur Nail Art contest this month. The theme is Love & Heartbreak, and I realise this doesn't really fit but it was inspired by a movement all about love so I'm going to enter anyway. Beautifully manicured fingers crossed!
Labels:
Barry M,
Glitters,
London Girl,
Multicoloured,
Nail Art,
OPI,
Rainbow,
Rimmel,
Tape Manis
Tuesday, 5 February 2013
Friendly Flowers
As I mentioned in my last post, that mani was created on a night where my friend did something rather more impressive that she's allowed me to share with you.
She's always loved ladybirds and when I happened to come across this beautiful ladybird/ladybug mani over at The Little Canvas I sent it to her because I knew she'd want to try it out. Alongside that she decide she wanted to some dotting tool flowers because she didn't want red polish on all of her nails. We practised together on a bit of old plastic packaging and were both surprised how easy the technique was to pick up and how effective it looked!
In total she used 8 polishes on her fingers, not including the base coat and top coat!
She's always loved ladybirds and when I happened to come across this beautiful ladybird/ladybug mani over at The Little Canvas I sent it to her because I knew she'd want to try it out. Alongside that she decide she wanted to some dotting tool flowers because she didn't want red polish on all of her nails. We practised together on a bit of old plastic packaging and were both surprised how easy the technique was to pick up and how effective it looked!
In total she used 8 polishes on her fingers, not including the base coat and top coat!
They were from L-R:
Number 17 Fast Finish in Nightshade, Rimmel I Heart Lasting Finish in Block Your Green, Colour Me in Colour Me White, London Girl in un-named shade 148, Barry M in Cobalt Blue, Rimmel I Heart Lasting Finish in Double Decker Red, L.A Colors Art Deco in Black and a top coat of Rimmel I Heart Lasting Finish in Disco Ball. Phew! It was definitely worth it though because the results looked awesome! She kept The Little Canvas mani open for reference and then just freehanded her designs using the brushes in the polishes or dotting tools, and this was the result:
To say she's never really done anything like this before (neither have I for that matter) I was really impressed with how well this turned out and will definitely be trying both of these techniques soon. The design is so fun and bright, I know she's really pleased with it and so am I!
~Nail Art Novice + Friend~
Monday, 14 January 2013
My First Mani...Snowy Days
Today it has been snowing heavily in Britain, and I wanted to do a snow inspired manicure because of this. I have the perfect polish in my collection for this, so all I needed was some base colours, which were fairly easy to choose.
I started with my normal base coat- Sally Hansen Double Duty which I noticed was sadly getting a little sticky and gloopy-time to order some more I guess!
The colours I chose were Barry M-Denim and a London Girl polish which doesn't have a name but is a pearly white colour.
I have a large collection of Barry M polishes, and I think for what they cost they're very good quality and fit perfectly into my budget! Denim is a surprisingly dark blue colour-like the colour of dark jeans- with small silver shimmers in and it went on very easily. I only needed two coats for full coverage and I could have easily got away with one. It's quite matte when it dries though, which I'm not a fan of, but it looks beautiful with some shiny top coat on.
The London Girl polish is a bit of an odd one. I got an online offer for 24 bottles of nail varnish for £20 which I didn't really think I could pass up. Although the colours are fantastic, the quality of polish isn't great and they take a long time to dry completely. I do like this pearly white colour, it's very shiny and pretty, but takes about 4-5 coats to reach opacity. Unfortunately I didn't take a picture at this stage, sorry! I've got the blue one my left hand, with a white accent nail and vice versa on my right.
Finally, I topped them off with my snowy glitter polish- Snow Daze by Absolut Lacquer, which is my favourite favourite Indie polish maker on Etsy. She's got great prices and really awesome polishes, and is kind to her international fans and doesn't charge extortionate shipping rates-plus she's really lovely and goes out of her way to give great customer service. I cannot recommend her enough!
Snow Daze is a blue glitter topper with lots of white glitters in-small squares, large/small hexagons and bars which look like snow in a pot! (Hence the reason I chose it!). It goes on really nicely, although I moved some of the big glitters around to get them more evenly spread out. I used one coat on each nail, and then a top coat of my trusty Seche Vite Quick Dry.
Here's the finished result:
I think it's a really pretty manicure. I just hope the snow lasts as long as the nail varnish will!
I started with my normal base coat- Sally Hansen Double Duty which I noticed was sadly getting a little sticky and gloopy-time to order some more I guess!
The colours I chose were Barry M-Denim and a London Girl polish which doesn't have a name but is a pearly white colour.
I have a large collection of Barry M polishes, and I think for what they cost they're very good quality and fit perfectly into my budget! Denim is a surprisingly dark blue colour-like the colour of dark jeans- with small silver shimmers in and it went on very easily. I only needed two coats for full coverage and I could have easily got away with one. It's quite matte when it dries though, which I'm not a fan of, but it looks beautiful with some shiny top coat on.
The London Girl polish is a bit of an odd one. I got an online offer for 24 bottles of nail varnish for £20 which I didn't really think I could pass up. Although the colours are fantastic, the quality of polish isn't great and they take a long time to dry completely. I do like this pearly white colour, it's very shiny and pretty, but takes about 4-5 coats to reach opacity. Unfortunately I didn't take a picture at this stage, sorry! I've got the blue one my left hand, with a white accent nail and vice versa on my right.
Finally, I topped them off with my snowy glitter polish- Snow Daze by Absolut Lacquer, which is my favourite favourite Indie polish maker on Etsy. She's got great prices and really awesome polishes, and is kind to her international fans and doesn't charge extortionate shipping rates-plus she's really lovely and goes out of her way to give great customer service. I cannot recommend her enough!
Snow Daze is a blue glitter topper with lots of white glitters in-small squares, large/small hexagons and bars which look like snow in a pot! (Hence the reason I chose it!). It goes on really nicely, although I moved some of the big glitters around to get them more evenly spread out. I used one coat on each nail, and then a top coat of my trusty Seche Vite Quick Dry.
Here's the finished result:
| Apologies for the messy edges, I tidied up as best I could! |
What do you think? Have you got any snow inspired manis to share? Let me know =)
~Nail Art Novice~
~Nail Art Novice~
Labels:
Absolut Lacquer,
Barry M,
Blues,
Glitters,
Indies,
London Girl,
Seasonal
Subscribe to:
Posts (Atom)