The week before Jenni went to Oz I went to Turkey so obviously I had to do some bright holiday nails!I did contemplate doing turkeys but decided to stick to a bright and simple gradient mani.
I used the following polishes; Tara's Talons-Super Soaker, Nails Inc-Big Red Apple, Essie-Fear and Desire, Nails Inc-Belsize Park, Nails Inc-Uptown Glamour and Tara's Talons-Fairy. I also used the Vinyl Boutique palm tree decals.Totally love these decals they're so easy to use and look fantastic!
I thought the blue would act as the sky making its way down through the colours to the gold as the sand.
I am pretty pleased with how these turned out and I they sparkled in the sun really prettily!
Not long now til Jenni gets back!
~Rara~
Showing posts with label Nails Inc. Show all posts
Thursday, 24 July 2014
Sunday, 6 July 2014
Rara's TETRIS Nails
Hello lovelies!
As you probably know Jenni is away in Australia and having a marvellous time I would imagine!! So I have done a few manis for her so she didn't have to do a whole month worth of manis before she went! By the way....I MISS YOUR FACE JENNI!! Come back sooooon!
Anyway for this mani, I took my inspiration from someone who I follow on Instagram...Dahlia Nails. I haven't been following long but I have seen about 10 of their manis that I already want to attempt! My first try was the copy their Tetris nails. They did theirs without the black outline but I thought it would be easier for me to draw the shapes with the black first and then fill them in.
I drew the shapes with my Andrea Fulerton black pen and then used the following colours for the shapes; Barry M-Guava, Tara's Talons-Super Soaker, Nails Inc-Big Red Apple, Nails Inc-Belsize Park, Nails Inc-Notting Hill Gate and Nails Inc-Westbourne Grove. Before I started I assigned each colour to a shape so it all matched over each of my fingers!
I really liked this mani, the only thing I didn't like was that not all the shapes were uniformly sized (OCD ALERT) some of my long straight shapes were twice the size of each other and it didn't look right in my eyes! However I did like how bright it was and I couldn't stop looking at it!
I am not sure I managed to recreate Dahlia Nails' perfect Tetris nails but I did give it a good try!
~Rara~
As you probably know Jenni is away in Australia and having a marvellous time I would imagine!! So I have done a few manis for her so she didn't have to do a whole month worth of manis before she went! By the way....I MISS YOUR FACE JENNI!! Come back sooooon!
Anyway for this mani, I took my inspiration from someone who I follow on Instagram...Dahlia Nails. I haven't been following long but I have seen about 10 of their manis that I already want to attempt! My first try was the copy their Tetris nails. They did theirs without the black outline but I thought it would be easier for me to draw the shapes with the black first and then fill them in.
I drew the shapes with my Andrea Fulerton black pen and then used the following colours for the shapes; Barry M-Guava, Tara's Talons-Super Soaker, Nails Inc-Big Red Apple, Nails Inc-Belsize Park, Nails Inc-Notting Hill Gate and Nails Inc-Westbourne Grove. Before I started I assigned each colour to a shape so it all matched over each of my fingers!
I really liked this mani, the only thing I didn't like was that not all the shapes were uniformly sized (OCD ALERT) some of my long straight shapes were twice the size of each other and it didn't look right in my eyes! However I did like how bright it was and I couldn't stop looking at it!
I am not sure I managed to recreate Dahlia Nails' perfect Tetris nails but I did give it a good try!
~Rara~
Sunday, 29 June 2014
Rara's Nautical Nails
Helloooo again!
For this mani I used Nails Inc-Big Red Apple, Tara's Talons-Supersoaker and a base of Barry M-Matt White. Also I used the anchor decals from The Vinyl Boutique. As you can see I recently bought some vinyl decals and I have been playing! I have never used them before so I was really pleased with how easy and simple they were to use especially to a complete beginner like me!
I used striping tape to do the lines on the accent nails but as I am very impatient and don't have a fast dry topcoat I always end up pulling the base coat off when I remove the tape and have to fill in the holes I have left behind!
I decided to only use my accent nails for the decals and I am glad I did because I think it makes the design look more striking!
This was a really quick and easy mani to do and I love all things nautical so it made me very happy!
*note to self* buy a fastdry topcoat!
~Rara~
For this mani I used Nails Inc-Big Red Apple, Tara's Talons-Supersoaker and a base of Barry M-Matt White. Also I used the anchor decals from The Vinyl Boutique. As you can see I recently bought some vinyl decals and I have been playing! I have never used them before so I was really pleased with how easy and simple they were to use especially to a complete beginner like me!
I used striping tape to do the lines on the accent nails but as I am very impatient and don't have a fast dry topcoat I always end up pulling the base coat off when I remove the tape and have to fill in the holes I have left behind!
I decided to only use my accent nails for the decals and I am glad I did because I think it makes the design look more striking!
This was a really quick and easy mani to do and I love all things nautical so it made me very happy!
*note to self* buy a fastdry topcoat!
~Rara~
Wednesday, 25 June 2014
Rara's Zigzags and Lightning Bolts
Hello all! Rara here again! Thought I'd do some blogs for Jenni while she was away, keep an eye out for them =)
Polishes used Barry M-Guava and Nails Inc-Belsize Park. I also added Tara's Talons-Fairy over the top of the bolts. Zigags and Lightening bolt decals from the vinyl boutique.
I loved this mani and I got loads of compliments on it (mainly from men which was weird!) It reminded me of Usain Bolt because the yellow turned the blue into a green and it kinda reminded me of the Jamaican Flag!I kept this mani on for ages and ages because I loved the strikingness (yes that is a word) of it!!
~Rara~
Polishes used Barry M-Guava and Nails Inc-Belsize Park. I also added Tara's Talons-Fairy over the top of the bolts. Zigags and Lightening bolt decals from the vinyl boutique.
I loved this mani and I got loads of compliments on it (mainly from men which was weird!) It reminded me of Usain Bolt because the yellow turned the blue into a green and it kinda reminded me of the Jamaican Flag!I kept this mani on for ages and ages because I loved the strikingness (yes that is a word) of it!!
~Rara~
Friday, 11 April 2014
Beauty and the Beast Nail Art
Hello! It's Rara! It's been rather a long time since my last post, I am still doing nails but Jenni is doing such beautiful manis that I don't want to tread on her toes (or fingernails!!).]
However, she has asked me to do a post for her about my current mani which is a Beauty and the Beast inspired mani. I used A LOT of nail varnishes and I'm not entirely convinced I've remembered them all!!
Avon-Garden Green, Barry M-Bright Red, Matt White, Guava, Red Glitter, Pearl, NYC-Skin Tight Denim, Sidewalkers, Nails Inc-Uptown Glamour, Belsize Park, Essie-Cascade Cool, Sinful Colors-Pistache, Black on Black, Easy Going, Tara'sTalons-Three Wise Men, Orly-Naughty, Andrea Fulerton-Rain Fall and Barry M-topcoat and basecoat!!
I decided I wanted to do Beauty and the Beast because I had seen so many people drawing faces and characters and I wanted to see if I was able to do it too. I only used a long thin brush. I realise that most people use Acrylic paint when they are doing such intricate details but A) I didn't have any acrylic paint and B) I kind of think it's cheating not to paint using nail varnish!
The characters I decided to paint were (left hand) Mrs Potts, a rose, Belle, Beast and Lumiere, (right hand) Cogsworth, Chip, Gaston, Fifi and another rose! I am a bit sad that I've got two roses but I did my left hand about three hours before my right and then I got to my little finger on my right hand and it is so tiny that I could only do another rose!
I am really pleased with Mrs Potts, Gaston and Belle especially, they turned out SO much better than I thought that they would and I can't stop looking at them. I will be super sad when I have to change my nails or when they inevitably chip or I break a nail!!So I hope you all enjoy my nails as much as I do and I hope to blog with a bit less of a gap than this one!!
Until next time,
Rara!
However, she has asked me to do a post for her about my current mani which is a Beauty and the Beast inspired mani. I used A LOT of nail varnishes and I'm not entirely convinced I've remembered them all!!
Avon-Garden Green, Barry M-Bright Red, Matt White, Guava, Red Glitter, Pearl, NYC-Skin Tight Denim, Sidewalkers, Nails Inc-Uptown Glamour, Belsize Park, Essie-Cascade Cool, Sinful Colors-Pistache, Black on Black, Easy Going, Tara'sTalons-Three Wise Men, Orly-Naughty, Andrea Fulerton-Rain Fall and Barry M-topcoat and basecoat!!
I decided I wanted to do Beauty and the Beast because I had seen so many people drawing faces and characters and I wanted to see if I was able to do it too. I only used a long thin brush. I realise that most people use Acrylic paint when they are doing such intricate details but A) I didn't have any acrylic paint and B) I kind of think it's cheating not to paint using nail varnish!
The characters I decided to paint were (left hand) Mrs Potts, a rose, Belle, Beast and Lumiere, (right hand) Cogsworth, Chip, Gaston, Fifi and another rose! I am a bit sad that I've got two roses but I did my left hand about three hours before my right and then I got to my little finger on my right hand and it is so tiny that I could only do another rose!
I am really pleased with Mrs Potts, Gaston and Belle especially, they turned out SO much better than I thought that they would and I can't stop looking at them. I will be super sad when I have to change my nails or when they inevitably chip or I break a nail!!So I hope you all enjoy my nails as much as I do and I hope to blog with a bit less of a gap than this one!!
Until next time,
Rara!
Wednesday, 2 April 2014
Fairy Cakes Nail Art
Hello lovelies!
This will have to be a quick post as I am running out the door in about 10 mins so please forgive me if I don't talk much!
I got one of the Nails Inc Sprinkles polishes from ebay the other day and thought it would be perfect for this nail art!
Polishes used: Barry M-Prickly Pear, Sinful Colors-Amethyst, Revlon-Blue Lagoon, Barry M-Cobalt Blue, Revlon-Sunshine Sparkle/Electric, Rimmel-Peppermint, Barry M-Greenberry, Rimmel-Tangy Tangerine, Barry M-Satsuma, Barry M-Matt White, Nails Inc-Sweets Way and Rimmel-Movie Star
I have to say these are making me really happy, which is good cos today I'm just having one of those days where you want to curl up in a ball under your quilt and wish the world would go away, so these are very welcome at the end of my fingers!
As I said, sorry for the brevity, but gotta dash!
~Nail Art Novice~
This will have to be a quick post as I am running out the door in about 10 mins so please forgive me if I don't talk much!
I got one of the Nails Inc Sprinkles polishes from ebay the other day and thought it would be perfect for this nail art!
Polishes used: Barry M-Prickly Pear, Sinful Colors-Amethyst, Revlon-Blue Lagoon, Barry M-Cobalt Blue, Revlon-Sunshine Sparkle/Electric, Rimmel-Peppermint, Barry M-Greenberry, Rimmel-Tangy Tangerine, Barry M-Satsuma, Barry M-Matt White, Nails Inc-Sweets Way and Rimmel-Movie Star
I have to say these are making me really happy, which is good cos today I'm just having one of those days where you want to curl up in a ball under your quilt and wish the world would go away, so these are very welcome at the end of my fingers!
As I said, sorry for the brevity, but gotta dash!
~Nail Art Novice~
Tuesday, 4 March 2014
March Tri Polish Tuesday The First
Hey lovelies! Happy Pancake Day! (Nom!)
Today I'm joining in with the Tri Polish challenge, although it's undergone a little revolution since last year. Basically the rules are now that there is a set of given colours for each month (details of which can be found here) and you do four manis with polishes matching those colour prompts BUT you no longer have to use the same polishes throughout. You still have free use of black/white/silver/gold and glitter toppers. This month's colours are green, blue and purple-all my faves and the polishes I have the most of, so I had to join in.
For today's mani, these are the (rather gorgeous) polishes I've used-all from the Shine On Collection by Nails Inc
L-R: Lyall Street, Elm Park Road, Raphael Street
Aren't they lovely? They're so much more sparkly in real life too! I also used Revlon-Silver Screen to break up the colours a bit. I've done a 'mermaid scale' mani on my accents and then stamped waves from the MoYou London-Sailor 3 plate on the rest.
I love love love these! They're so shiny and sparky! I really really like the Shine On collection, I think they're all pretty beautiful and together like this they look fab too! The mermaid scales took ages but I like the random look of them.
Don't forget to check out the other gorgeous tri-polish manis in the inlinkz and enjoy all your scrummy pancakes!!
~Nail Art Novice~
Today I'm joining in with the Tri Polish challenge, although it's undergone a little revolution since last year. Basically the rules are now that there is a set of given colours for each month (details of which can be found here) and you do four manis with polishes matching those colour prompts BUT you no longer have to use the same polishes throughout. You still have free use of black/white/silver/gold and glitter toppers. This month's colours are green, blue and purple-all my faves and the polishes I have the most of, so I had to join in.
For today's mani, these are the (rather gorgeous) polishes I've used-all from the Shine On Collection by Nails Inc
L-R: Lyall Street, Elm Park Road, Raphael Street
Aren't they lovely? They're so much more sparkly in real life too! I also used Revlon-Silver Screen to break up the colours a bit. I've done a 'mermaid scale' mani on my accents and then stamped waves from the MoYou London-Sailor 3 plate on the rest.
| Yeah I don't know what happened to my index finger either... |
I love love love these! They're so shiny and sparky! I really really like the Shine On collection, I think they're all pretty beautiful and together like this they look fab too! The mermaid scales took ages but I like the random look of them.
Don't forget to check out the other gorgeous tri-polish manis in the inlinkz and enjoy all your scrummy pancakes!!
~Nail Art Novice~
Friday, 28 February 2014
Feb Resolutions Check In
So you may remember that last time around when I did this, I had had a really good month and had kept up with my resolutions really well. This month has not been so successful...oops!
Resolution #1-Lemony Flutter
So I have...not used my LF all month. I really should have been but I just haven't. I think the fact that I've moved up to Sheffield and that my boyfriend has been in hospital so much has really just thrown me off. My cuticles look really bad on it though, so I am going to try and use it every night before bed in March if I can!
Resolution #2-Spend no more than £20 on polish things a month and/or buy no more than 4 polishes a month
Ah...this one I have done really terribly at this month. In total I have acquired SIXTEEN new polishes, which is 4 times more than I should have done! I did only pay for half of them though, as I have been very lucky this month and got a lot of freebies from various places. Lets have a look at my collection then:
Here's a pic of the glitters swatched so you can enjoy them!
Total spent: £35.79
Under/Over budget: Over, way, way over!
Number of new polishes acquired: Sixteen!
Fewer/More than four? SO MANY MORE.
I guess that's a double fail for me this month, oops! :-/ Will try harder next time!
See you next month,
~Nail Art Novice~
Resolution #1-Lemony Flutter
So I have...not used my LF all month. I really should have been but I just haven't. I think the fact that I've moved up to Sheffield and that my boyfriend has been in hospital so much has really just thrown me off. My cuticles look really bad on it though, so I am going to try and use it every night before bed in March if I can!
Resolution #2-Spend no more than £20 on polish things a month and/or buy no more than 4 polishes a month
Ah...this one I have done really terribly at this month. In total I have acquired SIXTEEN new polishes, which is 4 times more than I should have done! I did only pay for half of them though, as I have been very lucky this month and got a lot of freebies from various places. Lets have a look at my collection then:
| ...oops |
Top Row: Pocket Money Polishes-She's Like The Wind and Alien Like You, Black Cat Lacquer-Evergreen (all bought by me), Rara Avis-Cast Iron Cannon (made and given to me by Rara!!)
2nd Row: Sally Hansen-Cherry Drop, Revlon-Haunted Heart, Rimmel-Out Of The Blue, Sinful Colors-Ciao Bella, Sally Hansen-Razzleberry (all bought by me)
3rd Row: Nails Inc Shine On Collection-Elm Park Road, Raphael Street, Cadogan Gate, Lyall Street (bought for me for Valentine's by my boyfriend)
Bottom Row: Chubby Owl Polishes-Roses Are Red, Midnight Owls, Violets Are Blue (I bought Midnight Owls and Jenna included the minis as a lovely surprise in my parcel!)
Here's a pic of the glitters swatched so you can enjoy them!
L-R: Alien Like You (over Out Of The Blue), She's Like The Wind (over Cast Iron Cannon), Midnight Owls, Roses Are Red, Violets are Blue
So my total spend this month was...£35.79-eep! I am officially on a no-buy for the forseeable future now, sigh. I'm going to have to avoid Poundland like the plague and it's going to take all my resolve! Hopefully this month's pretties will keep me occupied for a while!
Total spent: £35.79
Under/Over budget: Over, way, way over!
Number of new polishes acquired: Sixteen!
Fewer/More than four? SO MANY MORE.
I guess that's a double fail for me this month, oops! :-/ Will try harder next time!
See you next month,
~Nail Art Novice~
Friday, 7 February 2014
Guest Post Week! Katie's Lost And Found
A Green skittle
Actually I really dislike Green skittles :p
Yea hi. I'll admit I had no idea where to start with this post. So I came and wandered around here looking for inspiration and eventually decided to use the lovely color theme here as a starting point. Seemed like a fun idea cos I never use green... until it occurred to me that, well, I never use Green and have no idea what to do with it!
Anyway, after many changes of mind along the way we have this.
Polishes are Nails Inc-Battersea on ring. Nails Inc-Green Park for the darker green and Sinful Colors-Mint Apple for the paler Green. The bonus being I'd not yet got round to playing with any of these before, and I like them a lot.
Hope it turned out ok.
Katie, http://www.katieslostandfound.blogspot.co.uk
Actually I really dislike Green skittles :p
Yea hi. I'll admit I had no idea where to start with this post. So I came and wandered around here looking for inspiration and eventually decided to use the lovely color theme here as a starting point. Seemed like a fun idea cos I never use green... until it occurred to me that, well, I never use Green and have no idea what to do with it!
Anyway, after many changes of mind along the way we have this.
Polishes are Nails Inc-Battersea on ring. Nails Inc-Green Park for the darker green and Sinful Colors-Mint Apple for the paler Green. The bonus being I'd not yet got round to playing with any of these before, and I like them a lot.
Hope it turned out ok.
Katie, http://www.katieslostandfound.blogspot.co.uk
Thursday, 6 February 2014
Guest Post Week! Monkey Nail Art
Hi all! I'm Rachel from Monkey Nail Art and I'm chuffed to bits to be doing a guest post for Nail Art Novice. Sometimes it's nice to get out and about, you know? Jenni is a fabulous artist and looking through her designs I knew I'd have to do something extra special. Two things struck me about Jenni's blog - rainbow colours and striping tape. So I got out my brightest polishes and came up with this:
This is a reverse gradient of sorts - that is, I started with a plain base colour, applied my striping tape and then sponged the gradient over the top. I love how the gold really pops out!
My base gold colour is from Claire's Accessories (unnamed.) Following that I used:
Nails Inc Big Apple Red
Rimmel Tangerine Queen
Collection 2000 Sherbet Lemons
Barry M Emerald Green
Essie Sweet Talker
Essie Butler Please
It's all finished off with Seche Vite for that extra gorgeous glossy finish.
Thanks so much to Nail Art Novice for having me on your blog and inspiring me to create such bright, bold nails!
This is a reverse gradient of sorts - that is, I started with a plain base colour, applied my striping tape and then sponged the gradient over the top. I love how the gold really pops out!
My base gold colour is from Claire's Accessories (unnamed.) Following that I used:
Nails Inc Big Apple Red
Rimmel Tangerine Queen
Collection 2000 Sherbet Lemons
Barry M Emerald Green
Essie Sweet Talker
Essie Butler Please
It's all finished off with Seche Vite for that extra gorgeous glossy finish.
Thanks so much to Nail Art Novice for having me on your blog and inspiring me to create such bright, bold nails!
Thursday, 9 January 2014
Guest Post by Lisa of Geordie Nails!
Hey lovelies! I've got a guest post for you this week, and I guess I should explain; this week I was supposed to be moving back to my beloved city of Sheffield, and so I had planned to take the entire week off blogging, hence the guest post. In actuality, the room I thought was mine got given to someone else (heart breakingly!) and so I'm not moving...yet! I'm still determined to get back there! The lovely Lisa sent me this post before I knew the room had fallen through, so I thought it would be rude not to use it since she's been so kind!
~
Hello! I'm Lisa from the blog Geordie Nails, and Jenni of Nail Art Novice has very kindly let me write a guest post while she's busy moving house. I decided to go with a well-wishing new home manicure!
For the design I used two stamping plates: Cheeky's Home Sweet Home and Bundle Monster BM315. To start with I painted a base colour of Model's Own's Blueberry Muffin, a very pale (and pleasantly scented) blue-purple. On my thumbs and ring fingers I painted Nails Inc.'s Maida Vale glitter as accent nails. And then onto the stamping! The Cheeky plate has a lovely full-nail "home sweet home" image; I used a cotton bud to remove the parts of the design I didn't need from the stamper before putting the houses and lettering onto my nails. I finished the design with a silver bird flying to its new home.
Here it is:
The best of wishes to Nail Art Novice for your move and I hope you're very happy in your new home!
Hugs,
Lisa, Geordie Nails xx
~
How lovely is that? The colours/glitter look awesome together and the stamping is perfect! Thank you to Lisa for doing this, even if I'm not moving at the moment, the sentiment is still very much appreciated. Keep your fingers crossed for me that I get there soon folks!
~Nail Art Novice~
~
Hello! I'm Lisa from the blog Geordie Nails, and Jenni of Nail Art Novice has very kindly let me write a guest post while she's busy moving house. I decided to go with a well-wishing new home manicure!
For the design I used two stamping plates: Cheeky's Home Sweet Home and Bundle Monster BM315. To start with I painted a base colour of Model's Own's Blueberry Muffin, a very pale (and pleasantly scented) blue-purple. On my thumbs and ring fingers I painted Nails Inc.'s Maida Vale glitter as accent nails. And then onto the stamping! The Cheeky plate has a lovely full-nail "home sweet home" image; I used a cotton bud to remove the parts of the design I didn't need from the stamper before putting the houses and lettering onto my nails. I finished the design with a silver bird flying to its new home.
Here it is:
Hugs,
Lisa, Geordie Nails xx
~
How lovely is that? The colours/glitter look awesome together and the stamping is perfect! Thank you to Lisa for doing this, even if I'm not moving at the moment, the sentiment is still very much appreciated. Keep your fingers crossed for me that I get there soon folks!
~Nail Art Novice~
Thursday, 19 December 2013
12 Days Of Xmas Nail Art 10-Santa
~Pic Heavy Post~
I saw some awesome ones by Pause For Polish yesterday and decided to recreate them as accents, along with some Santa hats. For my Santas I used Rimmel-Red Carpet/Serene plus W7-Black and Maybelline-Winner Takes It All. On my hats I added Barry M-Lady to add a touch of sparkle and to make the fluff look fluffier, oh and the background is Revlon-Silver Screen. My other fingers have a base of Tara's Talons-Carollers from my Advent Calendar which is a lovely forest green with gold glitters. On top of that is two coats of the appropriately named Absolut Lacquer-Mrs Claus' Night Out for that perfect mix of Festive colours!
First (pre clean up!) pic is to show Carollers in all its glory.
I also grabbed one without flash to show off Mrs Claus to her full potential-she's packed full of silver and red micro glitter and larger silver pieces:
I really like these! They're super festive and really rather cool I reckon. My Mum liked them so much that she asked me to do some on her too (and that's a big deal because she never ever wears nail polish!), which I think is pretty cool =D
Rara
Polishes used: Barry M-Retro Red, Essie-Cascade Cool, Nails Inc-Uptown Glamour, Barry M-Matt White and Andrea Fulerton black and silver.
I love my Santas!!!!!! I'm not sure if you can tell but they are tiny boots on my little finger! I like how happy and cutey my Santas' faces are!!!
It's "Christmas Day" today so I'm meeting Novice and we're going to swap gifts so it actually feels like Christmas now!!
~Rara~
Haha, yeah, we're going to take our Santa nails and eat some scrummy food whilst exchanging presents today, yay! I love Christmas!
Here, if you need them, are the challenge prompts one last time-only two left to go now.
And check out the other Santa manis too!
~Nail Art Novice~
Sunday, 15 December 2013
12 Days Of Xmas Nail Art 8-Holly
Hey lovelies, I'm back with day 8 of my Xmas challenge-can't quite believe how quickly these have sped by. There's only 4 left! I'm also reunited with my beloved fast dry topcoat, so there are a lot less dings in these nails than the last-phew!
So today's prompt is 'Holly' and I decided that I'd just do accent nails because I really wanted to use some of my festive glitters! The base for these is Revlon-Silver Screen and the glitter is Iconic Effect-Red, Green + Gold which is fabulously festive and basically does what it says on the tin. I sort of dabbled on two coats-could have used one as it looked quite pretty but this is Christmas time so I wanted ALL THE GLITTER =D
The holly leaves are Rimmel-Camouflage and Revlon-Emerald and the berries are Rimmel-Red Obsession topped with Barry M-Red Glitter.
It's weird, in real life the stripes down the middle of the leaves look much darker than the leaves themselves but there you go-must be the different finishes playing with my camera. Look at that glitter-isn't it fab?
Rara
Polishes used: Avon-Noir Emerald, Nails Inc-Uptown Glamour, Tara's Talons-Bauble, Barry M-Diamond Glitter, holly berries are Barry M-Red Glitter and leaves are Avon-Garden Green or green nail art pen. I was a little under inspired for these nails-I'm not the greatest at drawing holly leaves and lacked the imagination to make them exciting. However I am pleased with the final results!
~Rara~
I really like them! She's talking nonsense about not being able to draw the leaves I reckon. Also I loooove that glitter on her index finger-we have a joint Tara's Talon's advent calendar and she got that in it-bit jealous!
So there's our holly berries. As ever, don't forget to check out the other awesome ladies in their holly-day manicures (haha!) in the inlinkz.
Here's a reminder of the remaining prompts too, only four more to go!
~Nail Art Novice~
So today's prompt is 'Holly' and I decided that I'd just do accent nails because I really wanted to use some of my festive glitters! The base for these is Revlon-Silver Screen and the glitter is Iconic Effect-Red, Green + Gold which is fabulously festive and basically does what it says on the tin. I sort of dabbled on two coats-could have used one as it looked quite pretty but this is Christmas time so I wanted ALL THE GLITTER =D
The holly leaves are Rimmel-Camouflage and Revlon-Emerald and the berries are Rimmel-Red Obsession topped with Barry M-Red Glitter.
It's weird, in real life the stripes down the middle of the leaves look much darker than the leaves themselves but there you go-must be the different finishes playing with my camera. Look at that glitter-isn't it fab?
Rara
Polishes used: Avon-Noir Emerald, Nails Inc-Uptown Glamour, Tara's Talons-Bauble, Barry M-Diamond Glitter, holly berries are Barry M-Red Glitter and leaves are Avon-Garden Green or green nail art pen. I was a little under inspired for these nails-I'm not the greatest at drawing holly leaves and lacked the imagination to make them exciting. However I am pleased with the final results!
I really like them! She's talking nonsense about not being able to draw the leaves I reckon. Also I loooove that glitter on her index finger-we have a joint Tara's Talon's advent calendar and she got that in it-bit jealous!
So there's our holly berries. As ever, don't forget to check out the other awesome ladies in their holly-day manicures (haha!) in the inlinkz.
Here's a reminder of the remaining prompts too, only four more to go!
Monday, 9 December 2013
12 Days Of Xmas Nail Art 5-Bells
Hello lovelies!
I'm back with another Xmas mani today-I can't believe how quickly these are going past. Today's is Bells and I've freehanded some slightly wibbly ones! I started with a base of Rimmel-Purple Addict and on all but my accent fingers topped it with a coat of Iconic Effect-Extreme Holo Topcoat which is basically my new favourite thing ever. A way to make any polish not only holoy but extremely so? I had to have it! I get the feeling I'm going to be using it a lot, haha. For my bells I used Maybelline-Winner Takes It All and added a little detail with Rimmel-Red Carpet/Camouflage.
I love the bells but I'm more impressed with that holo topcoat-look at those gorgeous rainbows! You can get it on the Iconic Effect Etsy site and it comes in three intensities depending on how much holo you want! Because I am a true "holo ho" (to quote a lovely lady in one of my nail groups on FB) I had to have the extreme one, but I'm sorely tempted to pick up the others with some of my Xmas money too!
OK, so there's my bells, now let's have a look at Rara's:
Rara
Today I used Avon-Garden Green which is quite a nice shimmery green. The bells were done using Nails Inc-Uptown Glamour which I got out of a magazine for £1.40! And the bow detailing I used Barry M-Bright Red. The lettering was done by my trusty Andrea Fulerton...think I might love that woman! I wasn't too sure how to draw bells so they could quite possibly have looked nothing like they needed to. But in the end I think you can tell what they are! Jingle all the way to the next challenge...decorations, where I'm completely stumped......
~Rara~
I love Rara's little bells, I think they're fabulous! I think it's interesting how we both have our own favourite nail art pens-she loves the Andrea Fulerton ones but I'm much more of a Barry M fan! Each to their own ey?
Don't forget to check out the rest of the manis in the inlinkz!
~Nail Art Novice~
I'm back with another Xmas mani today-I can't believe how quickly these are going past. Today's is Bells and I've freehanded some slightly wibbly ones! I started with a base of Rimmel-Purple Addict and on all but my accent fingers topped it with a coat of Iconic Effect-Extreme Holo Topcoat which is basically my new favourite thing ever. A way to make any polish not only holoy but extremely so? I had to have it! I get the feeling I'm going to be using it a lot, haha. For my bells I used Maybelline-Winner Takes It All and added a little detail with Rimmel-Red Carpet/Camouflage.
| Please ignore my stubby nubbin of a middle finger =( |
OK, so there's my bells, now let's have a look at Rara's:
Rara
Today I used Avon-Garden Green which is quite a nice shimmery green. The bells were done using Nails Inc-Uptown Glamour which I got out of a magazine for £1.40! And the bow detailing I used Barry M-Bright Red. The lettering was done by my trusty Andrea Fulerton...think I might love that woman! I wasn't too sure how to draw bells so they could quite possibly have looked nothing like they needed to. But in the end I think you can tell what they are! Jingle all the way to the next challenge...decorations, where I'm completely stumped......
~Rara~
I love Rara's little bells, I think they're fabulous! I think it's interesting how we both have our own favourite nail art pens-she loves the Andrea Fulerton ones but I'm much more of a Barry M fan! Each to their own ey?
Don't forget to check out the rest of the manis in the inlinkz!
~Nail Art Novice~
Labels:
12 Days of Xmas,
Avon,
Christmas,
Holos,
Iconic Effect,
Maybelline,
Nails Inc,
Purples,
Rara,
Rimmel,
UK Indies
Friday, 31 May 2013
Roses Really Smell Like...
Hello lovelies!
You may recall my partner-in-blogging Rara broke her arm about a month ago? Well she came round to visit me this week while my parents were away and I did her nails for her. She's no longer in a plaster cast but she still has a lot of trouble moving her left arm/hand so it was kinda interesting and meant I had to move myself around her rather than the other way around, but we made it work. This is also why there's such a discrepancy in nail lengths between her two hands-she's not been using her left hand for anything so the nails have grown really well!
Rara wanted me to do a gradient on her, and I asked her if I could try out some roses because I'd never done them before (and my nails were freshly painted!) and she agreed. She chose all the colours, I just did the painting and it got MESSY, but we both had lots of fun =)
Polishes used:
Gradient: Red- Rimmel-Red Obsession, Mid-Pink- Rimmel-Rose Libertine, Pale Pink- Nails Inc-Elizabeth Street, Glitter- OPI-I Juggle...Men
Roses: Red and Pink as before, Middles- A-England-Iseult, Leaves- OPI-Thanks a Windmillion
As you may appreciate, it's quite difficult to take pictures of someone who can't move their hand, but we tried our best for you:
You may recall my partner-in-blogging Rara broke her arm about a month ago? Well she came round to visit me this week while my parents were away and I did her nails for her. She's no longer in a plaster cast but she still has a lot of trouble moving her left arm/hand so it was kinda interesting and meant I had to move myself around her rather than the other way around, but we made it work. This is also why there's such a discrepancy in nail lengths between her two hands-she's not been using her left hand for anything so the nails have grown really well!
Rara wanted me to do a gradient on her, and I asked her if I could try out some roses because I'd never done them before (and my nails were freshly painted!) and she agreed. She chose all the colours, I just did the painting and it got MESSY, but we both had lots of fun =)
Polishes used:
Gradient: Red- Rimmel-Red Obsession, Mid-Pink- Rimmel-Rose Libertine, Pale Pink- Nails Inc-Elizabeth Street, Glitter- OPI-I Juggle...Men
Roses: Red and Pink as before, Middles- A-England-Iseult, Leaves- OPI-Thanks a Windmillion
As you may appreciate, it's quite difficult to take pictures of someone who can't move their hand, but we tried our best for you:
I know my roses aren't perfect but they look pretty good from a distance and it was only my first attempt at them! I'm pretty happy with the gradient too, although it did get smudged a little by the glitter, but not too badly, it's not really noticeable in person.
I'm happy, Rara's happy, we hope you're happy too!
~Nail Art Novice & Rara~
Thursday, 14 March 2013
Giveaway Goodies
I recently won a giveaway organised by The Sorting House and my goodies turned up on Monday so I threw together a quick mani to share them all with you.
Here's what I won:
-3D nail stickers-mostly bows with a few flowers scattered through
-Derma V10 hand & nail cream
-Nails Inc Elizabeth Street
-Barry M Cappuccino
-Two stamping plates (A16/A26, not sure what brand. They've got random flowery designs on.), stamper and scraper
As soon as I opened the packaging I tried out the polishes just to see what they would look like on (please excuse the sloppiness of these photos, I didn't bother cleaning up as I just threw everything on in about 5 minutes so they're pretty messy):
| Three coats of each |
I have to say I was pleasantly surprised. I'm not normally a pink person-I don't normally wear it or choose it or anything, but I quite like these colours together. (even if they remind me of one of these guys!) I probably wouldn't wear the pink on its own but with the brown it looks quite sophisticated and grown up (well it would if I'd cleaned up!) and I am surprised just how much I like the combination.
I added a bow too, also something that's not very me but looks better than I expected:
They aren't too 3D that I would have problems wearing them-I couldn't wear manis that were gonna catch on things a lot because I'd just end up picking them off-they're actually pretty flat. I can't say I'm a huge bow convert but I might start using them more than I had originally thought because they add a nice detail without being too in your face.
I have to confess though, the bits of kit I'm most excited about is the stamping kit. I have already bought stamping plates from Ebay but the scraper they provided was metal and REALLY scratched up the plate when I first practised with it so I didn't want to use it again. I'm looking forward to using the plastic scraper from this kit and trying out stamping properly! (Coming up in a Try Something Tuesday post at some point I would imagine)
I did have a go stamping but I definitely need a lot more practice in this department as you can't really tell what it is! I love the looks it can create though so I'll definitely be doing it more often.
I have to confess though, the bits of kit I'm most excited about is the stamping kit. I have already bought stamping plates from Ebay but the scraper they provided was metal and REALLY scratched up the plate when I first practised with it so I didn't want to use it again. I'm looking forward to using the plastic scraper from this kit and trying out stamping properly! (Coming up in a Try Something Tuesday post at some point I would imagine)
I did have a go stamping but I definitely need a lot more practice in this department as you can't really tell what it is! I love the looks it can create though so I'll definitely be doing it more often.
So that's all my giveaway goodies! Oh and I tried the handcream out just before I typed this out too. Can't tell you what it smelt like (still suffering the end stages of cold, boo!) but it felt really nice and creamy and wasn't greasy at all-by the time I started typing it wasn't even leaving smears on the keyboard which is great. My hands feel very soft too so it seems to be doing its job!
All in all, I'm a happy camper!
~Nail Art Novice~
Check out what some other awesome British bloggers have been up to this week:
Tuesday, 12 March 2013
Try Something Tuesdays-Water Decals
I recently discovered YRNails water decals on Geordie Nails' blog and decided to treat myself and Rara to some (although Rara has only just discovered this and doesn't know which ones I've got her yet =p) because they have some really awesome designs but at prices which won't break the bank.
I got both the transparent designs and some full decals but this mani uses the partial ones, and I'm leaving the full ones for a braver day!
I had a couple of practises and they're fiddly little things so not great for someone like me who's clumsy and uncoordinated but I managed. They're not perfect but they still look really cool.
I chose these comic book style 'Pow' ones for my first time using them, and put them over what I consider to be "classic" comic colours-black, white, red, yellow and blue
Polishes used were the usual suspects: L.A Colors Art Deco-Black, Colour Me-Colour Me White, No 7-Siren, London Girl-Shade 148 and Barry M-Cobalt Blue.
I think these decals look really cool and I'm loving the retro feel to this mani. I was expecting them to be sticky once you removed the backing paper from them, but they aren't which means you can move them around until you are happy with their placing and then top coat the hell out of them to get them to stay there. They're not perfectly flat on my nails but I think that's more because I didn't cut them out perfectly so the edges have lifted slightly/because I didn't dry them all very well. You get 18 designs per pack, so I still have enough left to do a full mani if I wanted to-very good value for money at a pound a pack!
I think they're brill and will definitely be buying from them again in the future, as well as trying out my full patterned decals at some point too.
~Nail Art Novice~
Ooh and as a bonus here's a picture of one of my practice attempts over my mint nails:
I got both the transparent designs and some full decals but this mani uses the partial ones, and I'm leaving the full ones for a braver day!
I had a couple of practises and they're fiddly little things so not great for someone like me who's clumsy and uncoordinated but I managed. They're not perfect but they still look really cool.
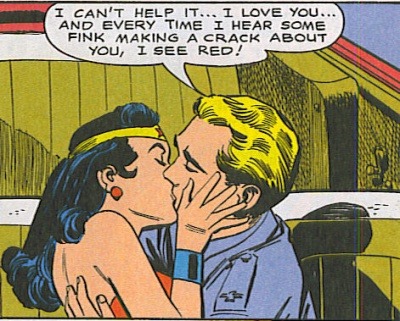
I chose these comic book style 'Pow' ones for my first time using them, and put them over what I consider to be "classic" comic colours-black, white, red, yellow and blue
| Like this...can't understand how he's talking AND kissing her at the same time though... (Via) |
I didn't want to waste a decal on a black polish so I did something a little different on my accent nails.
| I was going to write 'POW' in my bubble but my nails are just too teeny & I'm not that skilled! I like the exclamation mark too though. |
I think these decals look really cool and I'm loving the retro feel to this mani. I was expecting them to be sticky once you removed the backing paper from them, but they aren't which means you can move them around until you are happy with their placing and then top coat the hell out of them to get them to stay there. They're not perfectly flat on my nails but I think that's more because I didn't cut them out perfectly so the edges have lifted slightly/because I didn't dry them all very well. You get 18 designs per pack, so I still have enough left to do a full mani if I wanted to-very good value for money at a pound a pack!
I think they're brill and will definitely be buying from them again in the future, as well as trying out my full patterned decals at some point too.
~Nail Art Novice~
Ooh and as a bonus here's a picture of one of my practice attempts over my mint nails:
I thought he was too cute not to share really.
Subscribe to:
Posts (Atom)