It's Twinsie time once again here on my blog and this month I have two twinnies because there was an odd number of participants taking part. I was paired with the lovely Lothwen from Manis and Makeovers and the fabulous Hannah from The Dalai Lama's Nails and we were given the prompt Roses (this month's theme is flowers). We were discussing our ideas and decided we didn't want to do the traditional vintage style roses and that we'd try something a bit funkier-and eventually came up with the idea of doing our roses in black, white and a splash of colour, but do our own thing within those parameters. I'm looking forward to seeing what the other ladies came up with!
I used Barry M-Matt White, W7-Black, Topshop-Cloud and Barry M-SLE2013 B for my splash of colour (such a catchy name that one!) and did vintage style roses in a very different colour scheme!
I really like em! OK they don't look hugely like roses in the pictures but they do in real life, and I love the colour scheme-feels almost classy somehow, but with that bright green to liven it up. I'm really intrigued to see what my twins have come up with too-once their posts are up I will link to them here-make sure you go and see theirs too!
The Dalai Lama's Roses
Manis and Makeovers' Roses
You can get involved with the Twin Nails group on Facebook here but get in quick if you want to join in for June (the theme is Candy) as the pairings will be chosen soon. It's a really good way to meet more nail bloggers and it's pretty fun! I will sadly be missing the next couple as I will be in Australia (eee!) so get in there and take my place aspiring nail artists ;)
Don't forget to check out all the other twin posts in the inlinkz below =)
~Nail Art Novice~
Showing posts with label Topshop. Show all posts
Thursday, 29 May 2014
Saturday, 3 August 2013
Mish Mash Challenge Week 1-Purple
Hurrah, it's finally time for the Mish Mash challenge to begin! I've been looking forward to this for a while, and I reckon it's going to be pretty fun! For more details, go here.
This week's prompt is 'purple' and although I've only just done some minion nails for the OMD! Challenge, I couldn't resist rocking them again when my friend invited me to see Despicable Me 2 for the 2nd time (I just love those movies!)-only this time, of course, I did the purple 'evil' minions to fit with the theme.
Polishes used: Barry M-Prickly Pear, Matt White, Topshop-Cloud, Revlon-Electric, Maybelline-Dark Denim, L'Oreal-Valiant plus my Barry M Nail Art pens in black and white.
Don't forget to check out all the other purple entries in the inlinkz below. So excited to be back, woo!
This week's prompt is 'purple' and although I've only just done some minion nails for the OMD! Challenge, I couldn't resist rocking them again when my friend invited me to see Despicable Me 2 for the 2nd time (I just love those movies!)-only this time, of course, I did the purple 'evil' minions to fit with the theme.
Polishes used: Barry M-Prickly Pear, Matt White, Topshop-Cloud, Revlon-Electric, Maybelline-Dark Denim, L'Oreal-Valiant plus my Barry M Nail Art pens in black and white.
These were super fun to wear for a few days and I got a few compliments on them which is always good! And the film was brill too, of course!
Don't forget to check out all the other purple entries in the inlinkz below. So excited to be back, woo!
~Nail Art Novice~
Monday, 17 June 2013
Doc Martens Nail Art!
-Pic Heavy Post-
Hello lovelies!
Today I have a confession: I have another love outside of nail polish/nail art and that's my Doc Martens. I've got 5 pairs (at the moment) and keep adding more every year. My mum always rolls her eyes whenever I get a new pair and says "You can only wear one at a time!" so I thought I'd try and prove her wrong with some nail art. I had a quick search and couldn't find any previous examples out there so I came up with this design all by myself! I've been waiting to do it for months and months, because I needed the perfect blue and finally I have it (thankyou Barry M!).
Firstly, let me introduce you to my lovelies:
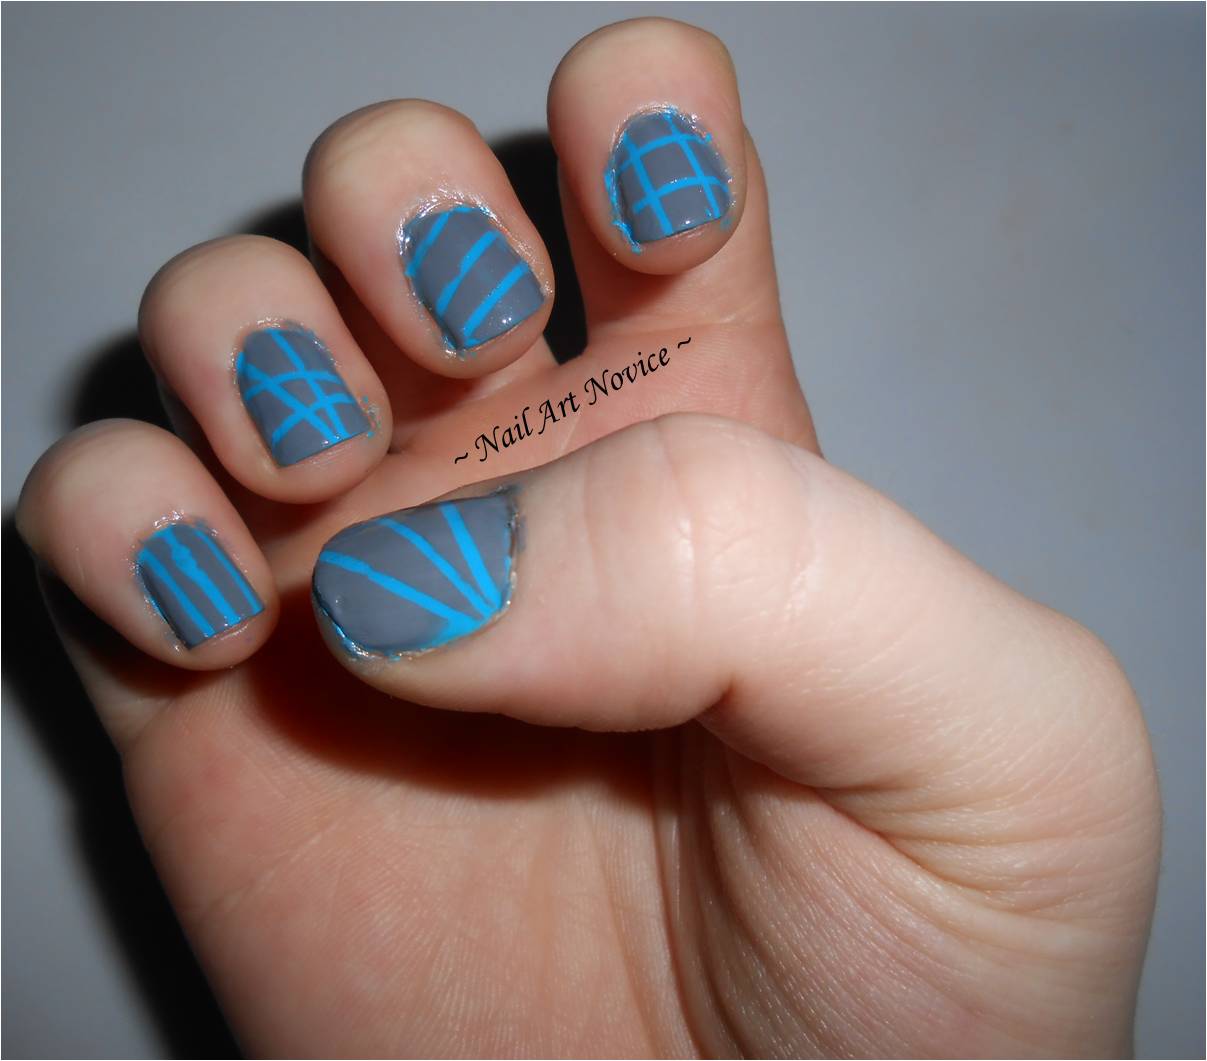
Anyway, on to the mani! I wanted to recreate the colours of my Docs as closely as I could so I used many many polishes! Red-Revlon-Fire, Teal-Sally Hansen-Fairy Teal, Blue-Barry M-Blue Grape, Patterned White-Barry M-Matt White, sponged with Topshop-Cloud and Rimmel-Tangy Tangerine and for the bright green Barry M 2013 Superdrug Limited Edition (such a catchy title)-Neon Green. I used two coats of them all, and put two coats of Matt White underneath the neon green too. For the iconic brown soles I used OPI-Suzi Loves Cowboys (over some curved French tip guide stickers) and for the instantly recognisable orange stitching I used a Stargazer polish-number 103 (UV-glow Orange). The black lacing details were done with the black Barry M nail art pen. Phew! I also used my H&M Matte top coat on my index/ring fingers to simulate the leather effect, as opposed to the patent shiny shiny ones. I'm not sure how well you can tell in these pics though! (I have to admit I had a lot of fun taking them!)
What do you reckon? Are they too cool for school or what? I could do a tutorial for these if people wanted, although I reckon they're pretty easy to figure out! If you do your own version, let me know =)
They make me super happy! =D
~Nail Art Novice~
In a total piece of blogging serendipity, I didn't even realise that one of the nail art groups I'm part of has the theme of 'Shoes' for this week! So here's some more footwear inspired manis:
Labels:
Barry M,
Doc Martens,
Matte,
Multicoloured,
Nail Art,
OPI,
Revlon,
Rimmel,
Sally Hansen,
Stargazer,
Topshop
Wednesday, 29 May 2013
ABC Challenge: U is for Upcycled Umbrellas
I decided at the end of the weekend that I wanted to do something more fun with my grey gradients so I decided to incorporate them into this challenge and 'up-cycle' them. They were the perfect colours for a rainy theme, so I went with umbrellas and raindrops.
Polishes used:
Backgrounds: (as before) - Revlon-Hazy (Lightest grey), Topshop-Cloud (mid grey), Rimmel-Stormy Skies (darkest grey) and OPI-I Juggle...Men
Umbrellas: Barry M nail art pen in Black, George-Under The Sea (to get another 'U' in there), Revlon-Blue Lagoon, Rimmel-Pear Drop
Cloud (ring finger): A mix of Revlon-Hazy and Topshop-Cloud
Puddle/Raindrops: A mix of Revlon-Blue Lagoon, Sally Hansen-Himalayan Blue, Rimmel-Aqua Cool and Barry M-Neptune Sea
I enjoyed doing these, they were all just sort of freehanded on. To make the water I just put a small amount of each colour on a paintbrush and painted to see what came out of it. I quite like the fact that there's a real mix of colours in there, and each raindrop is slightly different to its neighbours. Unfortunately this mani didn't last long, because my grey-dients were already in a state when I put this on, so I probably took it all off about 12 hours later. It was fun while it lasted though!
~Nail Art Novice~
Check out the other awesome 'U' manicures:
Polishes used:
Backgrounds: (as before) - Revlon-Hazy (Lightest grey), Topshop-Cloud (mid grey), Rimmel-Stormy Skies (darkest grey) and OPI-I Juggle...Men
Umbrellas: Barry M nail art pen in Black, George-Under The Sea (to get another 'U' in there), Revlon-Blue Lagoon, Rimmel-Pear Drop
Cloud (ring finger): A mix of Revlon-Hazy and Topshop-Cloud
Puddle/Raindrops: A mix of Revlon-Blue Lagoon, Sally Hansen-Himalayan Blue, Rimmel-Aqua Cool and Barry M-Neptune Sea
| Posing with my umbrella, as you do |
I enjoyed doing these, they were all just sort of freehanded on. To make the water I just put a small amount of each colour on a paintbrush and painted to see what came out of it. I quite like the fact that there's a real mix of colours in there, and each raindrop is slightly different to its neighbours. Unfortunately this mani didn't last long, because my grey-dients were already in a state when I put this on, so I probably took it all off about 12 hours later. It was fun while it lasted though!
~Nail Art Novice~
Check out the other awesome 'U' manicures:
Labels:
ABC Challenge,
Barry M,
George,
Greys,
Nail Art,
Revlon,
Rimmel,
Sally Hansen,
Topshop,
Upcycled Mani,
Weather
Thursday, 23 May 2013
A Grey-dient and a Plea
Hello lovelies!
I was going to do some awesome 'T' themed nail art for this week's ABC challenge but then I realised I needed work appropriate nails for this weekend as I'm working for my friend's company (Yay for the work, boo for the nails!)
I had no intention of doing gradients originally but Rara wanted me to do some on her when she came to visit (with her broken arm) so I decided to practice on myself first and I'm actually really glad I did!
Polishes used: Revlon-Hazy (Lightest grey), Topshop-Cloud (mid grey) and Rimmel-Stormy Skies (darkest grey). To make them slightly more interesting without making them inappropriate for work I added the subtlest of sparkles with OPI-I Juggle...Men which flashes blue and purple in the light but is otherwise fairly un-noticeable.
I said in the title of this post that it contained a plea so here it is:
I was going to do some awesome 'T' themed nail art for this week's ABC challenge but then I realised I needed work appropriate nails for this weekend as I'm working for my friend's company (Yay for the work, boo for the nails!)
I had no intention of doing gradients originally but Rara wanted me to do some on her when she came to visit (with her broken arm) so I decided to practice on myself first and I'm actually really glad I did!
Polishes used: Revlon-Hazy (Lightest grey), Topshop-Cloud (mid grey) and Rimmel-Stormy Skies (darkest grey). To make them slightly more interesting without making them inappropriate for work I added the subtlest of sparkles with OPI-I Juggle...Men which flashes blue and purple in the light but is otherwise fairly un-noticeable.
I really like the way this has turned out. I don't know why I've not attempted a gradient before but I shall be trying them again because they're actually really pretty in a subtle, less in your face way than most nail art. I didn't actually end up doing them on Rara, but there's always next week for that!
I will hopefully still get my 'T' nails done on Monday too-keep an eye out!
I said in the title of this post that it contained a plea so here it is:
Me and Rara have entered a competition to win a holiday to Dublin and we've made it to the final 5! Now it's all down to Facebook votes and we really need your help! If you could take a couple of seconds to go to this link and vote for 'Jenni and Sarah' I would be so so grateful! And of course, if we won, we'd both sport appropriate Irish-themed nails!
Thank you so much!
Thank you so much!
~Nail Art Novice~
Tuesday, 19 February 2013
Try Something Tuesdays-Striping Tape
It's time for another Try Something Tuesday post, hasn't time flown since the last one?
This week I'm trying out another really easy technique-using striping tape to create patterns on my nails.
I started with a base of Sally Hansen Insta Dry Brisk Blue which is a frankly AMAZING bright bright blue colour on its own. I had originally planned to team it with Sally Hansen Hard as Nails Xtreme Wear Going Green (from this post) but once I saw it on my nails I realised that the two together would be a bit too clashing and wouldn't really work very well, so I stuck to the one colour in the end.
I did a different pattern on each of my nails just to try them all out and see which ones I liked.I think I prefer the abstract one on my ring finger and the vertical lines on my little finger the most. It's weird just how much the grey has dulled the amazingness of the blue underneath, it almost looks more turquoise than bright blue now. They're not perfect, but I do think they look quite cool in bright light, in duller lighting they just look kinda tealy/grey and you can't really see the patterns. I almost decided to change my top colour for my right hand, but thought this would probably look even more peculiar so I stuck with the grey and overall it's turned out OK. I wish I had a paler grey though, it might have looked a little better.
Still the technique is pretty easy and not too time consuming for an effect which looks quite striking-I'll definitely be doing this again with different colours.
~Nail Art Novice~
This week I'm trying out another really easy technique-using striping tape to create patterns on my nails.
I started with a base of Sally Hansen Insta Dry Brisk Blue which is a frankly AMAZING bright bright blue colour on its own. I had originally planned to team it with Sally Hansen Hard as Nails Xtreme Wear Going Green (from this post) but once I saw it on my nails I realised that the two together would be a bit too clashing and wouldn't really work very well, so I stuck to the one colour in the end.
| This is two coats. |
It's such a fantastically bright colour-dazzingly blue, it's amazing! The brush was really wide too-I managed to cover most of my nails with one swipe up the middle which doesn't happen very often. Dried pretty quickly too, as its name would suggest. Then I added my striping tape one nail at a time and covered it with a layer of Topshop's Cloud, a creamy grey polish. The first nail I did lifted off all the blue as well, so I went back and topped them all with a coat of Seche Vite and allowed it to dry before trying again. This was much more successful, although I still ended up getting better with practice-hence why you're getting pictures of my right hand today, it's a little neater than my left. It also has slightly longer nails due to cheese slicer related incidents.
| Above two pictures taken with flash |
| Natural Light |
Still the technique is pretty easy and not too time consuming for an effect which looks quite striking-I'll definitely be doing this again with different colours.
~Nail Art Novice~
Subscribe to:
Comments (Atom)
